Gefüllte Conchiglie

Bei meinem letzten Großeinkauf beim Italiener waren auch große Muschelnudeln im Korb gelandet. Sicher wollte ich die irgendwann einmal füllen, aber der Zufall spielte mir wieder ein Rezept in die Hände, welches ich gleich ausprobieren wollte. Da konnte ich auch gleich den gekauften Provolone verwenden und auch eine neue Verwendungsmöglichkeit für Auberginen ausprobieren. Anfangs mochte ich dieses Gemüse ja überhaupt nicht - saugt Fett wie ein Schwamm und wird schnell braun und "labberig". Leider ist aber gelegentlich die Auswahl an brauchbarem Gemüse im Supermarkt gering, so dass ich auf Auberginen (die noch einigermaßen gut aussahen) zurückgreifen mußte. Es ärgert mich dass es hier keinen guten Gemüsehändler gibt, noch dazu einen der länger als 18 Uhr geöffnet ist - meine letzten guten Einkäufe habe ich immer im Asia-Laden im Dresdner Hauptbahnhof erledigt, aber das ist wieder eine ganz andere Sache ...
Jetzt wieder zu den Gefüllten Conchiglie:
  • eine Knoblauchzehe, fein gehackt
  • je eine halbe Zwiebel und Möhre, fein gehackt
  • 200 ml Olivenöl
  • eine Handvoll Basilikum
  • 500g passierte Tomaten
  • Salz und Pfeffer
  • eine mittelgroße Aubergine, in kleine Würfel geschnitten
  • 400 g Conchiglione (Muschelnudeln)
  • 200g Provolone (oder einen anderen Räucherkäse), gewürfelt
  • 100 g Ricotta
  • 50 g Parmesan, frisch gerieben
Knoblauchzehe, Möhre und Zwiebel im Olivenöl andünsten, Basilikum und passierte Tomaten dazugeben und etwas einkochen lassen. Mit Salz und Pfeffer würzen und etwas abkühlen lassen. Das restliche öl in einem hohen Topf erhitzen und die Auberginenwürfel darin frittieren, auf einem Küchentuch abtropfen lassen. Die Nudeln in Salzwasser drei Minuten kochen. Ein Drittel der Tomatensoße mit Ricotta, Provolone und den Auberginenwürfeln mischen, abschmecken und damit die Nudeln füllen. Den Boden einer Auflaufform (oder in meinem Fall von drei kleinen, jede berechnet für eine Portion) mit der Hälfte der restlichen Soße bedecken, die Nudeln mit der offenen Seite nach oben hineinlegen und dann mit Soße und Parmesan bedecken. Im vorgeheizten Ofen bei 175°C 10-15 Minuten überbacken.

Die dritte Portion, die eigentlich für den nächsten Tag aufgehoben werden sollte, hat den Abend nicht mehr überlebt ...

Kartoffel-Forellen-Salat

Um acht abends - Robert: Gibt es heute noch etwas aus der Küche? Ich überlege. Eigentlich habe ich keine Lust noch etwas zu kochen nachdem ich gestern schon Pizza-Schnecken für die monatliche Klinikweiterbildung gebacken hatte. Mal sehen. Einige Reste warten noch auf ihre Verwertung, darunter auch reduzierte Sachen kurz vorm Verfallsdatum, die ich im Rabatt-Wahn erstanden hatte und die jetzt schon darüber hinaus sind ... Was wollte ich eigentlich mit dem Forellenfilet? Da mache ich jetzt einen Kartoffelsalat!

  • 150 g Forellenfilet, in kleine Stücke zerpflückt
  • 10 kleine Kartoffeln, mit Schale gekocht und in Scheiben geschnitten
  • ein Bund Radieschen, in Scheiben geschnitten
  • zwei Lauchzwiebeln, in Scheiben geschnitten
  • eine große Tomate, fein gewürfelt

Für das Dressing:

  • ein EL Senf
  • ein EL Majonaise
  • 2 TL TK-Dill
  • ca. einen halben EL Honig
  • einen TL Wasser
  • Salz & Pfeffer

Am besten schmeckt der Salat wenn die Kartoffel noch warm untergemischt werden und ein paar Minuten durchziehen.

The daring bakers May challenge - Strudel

The May Daring Bakers' challenge was hosted by Linda of make life sweeter! and Courtney of Coco Cooks. They chose Apple Strudel from the recipe book Kaffeehaus: Exquisite Desserts from the Classic Cafés of Vienna, Budapest and Prague by Rick Rodgers.

I have never been very keen on strudel - the reason is my aversion against raisins, so I was glad I got the choice of choosing the filling. Making the dough shouldn't be the problem, but shaping and filling it - I honestly thought it would become a unrecognisable mess. But quite the contrary, it turned out very well.

Ricotta-Chocolate- Strudel

Strudel dough

from "Kaffeehaus - Exquisite Desserts from the Classic Cafés of Vienna, Budapest and Prague" by Rick Rodgers

  • 1 1/3 cups (200 g) unbleached flour
  • 1/8 teaspoon salt
  • 7 tablespoons (105 ml) water, plus more if needed
  • 2 tablespoons (30 ml) vegetable oil, plus additional for coating the dough
  • 1/2 teaspoon cider vinegar (I used white balsamico)


Combine the flour and salt. Mix the water, oil and vinegar in a measuring cup. Add the water/oil mixture to the flour - I used a spoon to do that. You will get a soft dough. Make sure it is not too dry, add a little more water if necessary. With the dough hook, knead on medium speed until you get a soft dough ball with a somewhat rough surface.Take the dough out of the mixer and continue kneading by hand on an unfloured work surface. Knead for about 2 minutes. Pick up the dough and throw it down hard onto your working surface occasionally.
Shape the dough into a ball and transfer it to a plate. Oil the top of the dough ball lightly. Cover the ball tightly with plastic wrap. Allow to stand for 30-90 minutes (longer is better).

Filling

It was up to us what kind of filling we would like to do, and I decided to create something with Ricotta. During the last weeks I had always a craving for Tiramisu, so the ingredients came out tiramisu-style ...

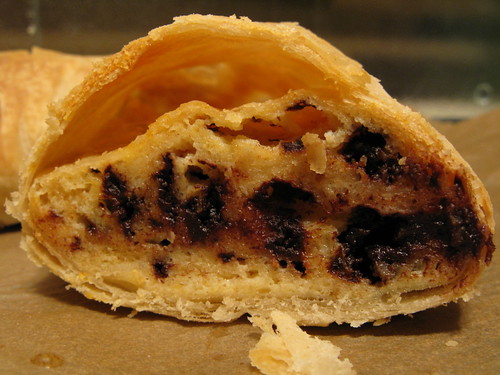
  • 250 g Ricotta
  • 15 ml Marsala
  • 1 teaspoon Vanilla sugar
  • two eggs
  • 125 g Creme double
  • juice and grated peel of 1/2 lemon
  • 30 g sugar
  • 50 g dark chocolate, coarsly chopped
  • crumbs of 10 ladyfingers

and: unsalted butter, melted


Putting everything together


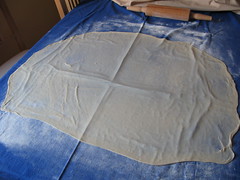
It would be best if you have a work area that you can walk around on all sides like 90 cm round table or a work surface of 60 x 100 cm. Cover your working area with table cloth, dust it with flour and rub it into the fabric. Put your dough ball in the middle and roll it out as much as you can.
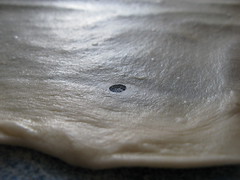
Pick the dough up by holding it by an edge. This way the weight of the dough and gravity can help stretching it as it hangs. Using the back of your hands to gently stretch and pull the dough. You can use your forearms to support it.The dough will become too large to hold. Put it on your work surface. Leave the thicker edge of the dough to hang over the edge of the table. Place your hands underneath the dough and stretch and pull the dough thinner using the backs of your hands. Stretch and pull the dough until it's about 60 cm wide and 90 cm long, it will be tissue-thin by this time. Cut away the thick dough around the edges with scissors. The dough is now ready to be filled. Few small holes in the dough is not a problem as the dough will be rolled, making (most of) the holes invisible.


For my part, it didn't work with stretching it by hanging over the edge - I was too afraid that I would get holes. So I stretched the dough with the help of my forearms, transfered it back on the table and did the rest by putting my hands underneath. The other thing was that the table cloth I used had some creases (I never iron things ...) so it was tricky to put the butter on the dough because of that. Every time I met a crease with my hand the dough looked as ist it would get holes immediately, so I had to be careful with applying the butter ...
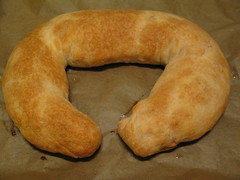
Put the rack in the upper third of the oven and preheat the oven to 200°C. Line a large baking sheet with baking paper (parchment paper). Spread about 3 tablespoons of the melted butter over the dough using your hands (a bristle brush could tear the dough, you could use a special feather pastry brush instead of your hands). Spread the filling about 8 cm from the short edge of the dough in a 15cm-wide strip. 4. Fold the short end of the dough onto the filling. Lift the tablecloth at the short end of the dough so that the strudel rolls onto itself. Transfer the strudel to the prepared baking sheet by lifting it. Curve it into a horseshoe to fit. Tuck the ends under the strudel. Brush the top with melted butter.

Bake the strudel for about 30 minutes or until it is deep golden brown. Cool for at least 30 minutes before slicing. Use a serrated knife and serve either warm or at room temperature. It is best on the day it is baked.
Robert ate nearly the whole strudel within a few days, the rest was warmed up and served with vanilla sauce to a good friend of mine.


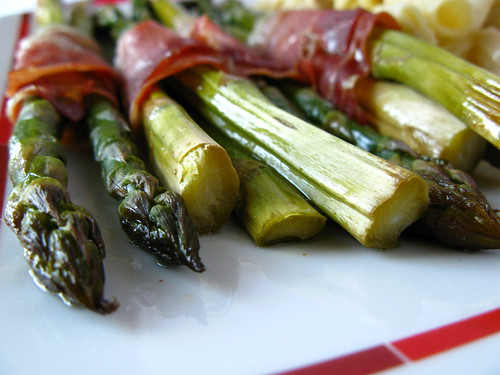
Grüner Spargel mit Serrano-Schinken und Wermutsoße

Was macht man mit Resten? Genau: Zusammen mit Sachen verwerten, die man eigentlich mal für ein anderes Gericht geplant hatte! Unsere Protagonisten dieses Mal: Serrano-Schinken und Spargel zusammen mit Schmand und Wermut, die dringend aufzubrauchen waren ... Das Rezept ist angelehnt an ein ähnliches Gericht mit Bandnudeln und einer Soße mit Wermut, grünem Spargel und Krabben (die Grundlage der Soße war aber eine Mehlschwitze, die ich persönlich nicht so mag) und dem "berühmten" Alupäckchen mit grünem Spargel, Schinken und Parmesan.

Zutaten:

  • eine Schalotte
  • ein Bund grüner Spargel
  • acht Scheiben Serrano-Schinken
  • ein halbes Glas trockener Wermut (zB Martini)
  • 2 EL Zitronensaft
  • 200 g Schmand
  • zwei Handvoll frisch geriebener Parmesan
  • Olivenöl, Salz und Pfeffer

Den Boden einer feuerfesten Form mit etwas Olivenöl ausfetten. Die Schalotte in dünne Scheiben schneiden und auf dem Boden verteilen. Spargel waschen und evt. holzige Enden abschneiden. Zu acht "Paaren" von zwei oder drei Stück teilen, jeweils ein Paar in der Mitte mit dem Schinken umwickeln und nebeneinander in die Form legen. Salzen und pfeffern, Zitronensaft, noch etwas Olivenöl und den Wermut darüber verteilen, mit Alufolie abdecken und bei 180°C für ca 20 Minuten in den Backofen stellen. Dann die Spargelpakete aus der Form nehmen und die verbliene Soße gut mit dem Schmand und dem Parmesan vermischen. Eventuell noch einml abschmecken. Dazu passen Nudeln oder Ofenkartoffeln.


Ich hatte noch Reste gebratenes Putenfleisch welches ich unter die Nudeln gemischt habe, da war das auch verwertet...

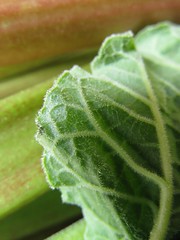
Rhabarber-Erdbeer-Marmelade mit Limoncello

Ich liebe Rharbarber. Nach einigen Kompott-Einkoch-Aktionen, die damit endeten daß das gesamte Ergebnis im Mund und nicht im Vorratsschrank landete wollte ich unbedingt etwas Haltbares herstellen bevor die Saison vorbei ist. Also Marmelade kochen ...

Rharbarber

  • 500 g Rharbarber, in ca 5 cm lange Stücke geschnitten

  • 45 g brauner Zucker


Rharbarber auf ein mit Backpapier ausgelegtes Blech oder eine Auflaufform legen, mit dem Zucker bestreuen und bei 180°C im vorgeheizten Backofen 20 min garen. Noch heiß in eine Schüssel geben und pürieren.

Erdbeeren

  • 500 g Erdbeeren, püriert

20 ml Limoncello

Frucht mit dem Alkohol vermischen und laut Packungsanleitung mit Gelierfix 3 zu 1 verarbeiten. Achtung: Die Mischung brennt am Boden an, also vorsichtig rühren um evt Spuren nicht in der Masse zu verteilen.


Puten-Kürbis-Curry

Zur Zeit habe ich eine unersättliche Kürbislust. Die Pflanzen, die zeitweilig im Bad wucherten sind inzwischen eingepflanzt, aber bis zu den fertigen Früchten ist es noch lang ... Da mußte mal wieder die Karstadt-Feinkostabteilung meine Gier befriedigen. Putenfleisch hatte ich auch preiswert erstanden (weil kurz vor dem Verfallsdatum) und die rote Currypaste wollte ich sowieso verbrauchen da die schon ganz schön lange im Kühlschrank steht. Es passte alles zu dem Gedanken an ein in einer meiner Zeitschriften erspätem Curry-Rezept. Bei genauerer Betrachtung stellte sich aber heraus, das ich weder die erforderliche Menge an Kokosmilch noch Porree im Haus hatte. Da war wieder improvisieren angesagt, dabei habe ich gleich noch den Rest Erdnusscreme verwertet. Das Ergebnis war garantiert leckerer als das Original!

  • 500 g Putenfleisch
  • 500 g Hokkaido-Kürbis
  • 2 große Zwiebeln
  • eine Knoblauchzehe
  • 200 ml Kokosmilch und 150 ml Wasser
  • 3 EL Erdnußbutter
  • 200 g griechischer Joghurt (10%) (alternativ doppelte Menge Kokosmilch)
  • 2 gehäufte TL rote Currypaste
  • eine kleine getrocknete Chilischote
  • Salz und Pfeffer

Putenfleisch in große Würfel schneiden, mit Salz und Pfeffer würzen und separat anbraten. Zwiebel, Knoblauch, Chili und Kürbis anbraten und für ca drei Minuten dünsten lassen, Currypaste dazugeben und weiterbraten. Fleisch, Erdnußbutter, Kokosmilch, Joghurt und Wasser dazugeben, gut umrühren und salzen. Ca. 30-40 Minuten offen köcheln lassen, eventuell länger (je nach gewünschter Konsistenz des Kürbis). Noch einmal mit Salz abschmecken. Mit Basmatireis servieren.

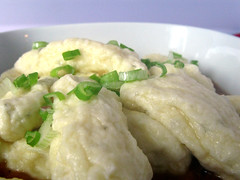
The daring cooks May challenge -Zuni Ricotta Gnocchi

To be honest, I once swore myself never to make gnocchi. It looked too complicated, and the prepared ones from the supermarked tasted well enough for me. Although I own the Jamie Oliver Cookbook where he explains how to make them I never thought I would even try. Well,
I guess it's how I ended up cooking risotto - you just do and find out it's not that complicated as you thought. I have to confess I skipped the testing-step completely - and I was lucky ... They turned out to be perfect! As for the sage I used as flavour I remembered a recipe I usally cook in autumn - filled sqash. I remembered I had some leftovers in the freezer, so I used them for the
sauce. The taste was incredible, and the texture was suprisingly fluffy - maybe there will be more home made gnocchi soon ...


Source: From The Zuni Café Cookbook.
makes 40 to 48 gnocchi (serves 4 to 6)

Prep time: 24 (draining) + 1 hour

Tips:
Do not skip the draining step. Even if the fresh ricotta doesn't look very wet, it is. Draining the ricotta will help your gnocchi tremendously.
When shaping your gnocchi, resist the urge to over handle them. It's okay if they look a bit wrinkled or if they're not perfectly smooth.
If you're not freezing the gnocchi for later, cook them as soon as you can. If you let them sit around too long they may become a bit sticky.
gnocchi:

  • 454 g fresh ricotta
  • 2 large cold eggs, lightly beaten
  • 1 tablespoon (1/2 ounce) unsalted butter
  • 2 or 3 fresh sage leaves (I used 1 teaspoon dried)
  • 60 g Parmigiano-Reggiano, grated
  • about ¼ teaspoon salt
  • all-purpose flour for forming the gnocchi

Preparing: If the ricotta is too wet, your gnocchi will not form properly. In her cookbook, Judy Rodgers recommends checking the ricotta's wetness. To test the ricotta, take a teaspoon or so and place it on a paper towel. If you notice a very large ring of dampness forming around the ricotta after a minute or so, then the ricotta is too wet. To remove some of the moisture, line a sieve with cheesecloth or paper towels and place the ricotta in the sieve. Cover it and let it drain for at least 8 hours and up to 24 hours in the refrigerator. Alternatively, you can wrap the ricotta carefully in cheesecloth (2 layers) and suspend it in your refrigerator for 8 to 24 hours with a bowl underneath to catch the water that's released. Either way, it's recommended that you do this step the day before you plan on making the gnocchi.

To make great gnocchi, the ricotta has to be fairly smooth. Place the drained ricotta in a large bowl and mash it as best as you can with a rubber spatula or a large spoon (it's best to use a utensil with some flexibility here). As you mash the ricotta, if you noticed that you can still see curds, then press the ricotta through a strainer to smooth it out as much as possible. Add the lightly beaten eggs to the mashed ricotta.Melt the tablespoon of butter. As it melts, add it to the ricotta mixture. Add in any flavouring that you're using. If you're not using any particular flavouring, that's fine. Add the Parmigiano-Reggiano and the salt. Beat all the ingredients together very well. You should end up with a soft and fluffy batter with no streaks (everything should be mixed in very well). In a large, shallow baking dish or on a sheet pan, make a bed of all-purpose flour that's1,5 cm deep. With a spatula, scrape the ricotta mixture away from the sides of the bowl and form a large mass in the centre of your bowl. Using a tablespoon, scoop up about 2 to 3 teaspoons of batter and then holding the spoon at an angle, use your finger tip to gently push the ball of dough from the spoon into the bed of flour. At this point you can either shake the dish or pan gently to ensure that the flour covers the gnocchi or use your fingers to very gently dust the gnocchi with flour. Gently pick up the gnocchi and cradle it in your hand rolling it to form it in an oval as best as you can, at no point should you squeeze it. What you're looking for is an oval lump of sorts that's dusted in flour and plump. Fill a small pot with water and bring to a boil. When it boils, salt the water generously and keep it at a simmer. You
will use this water to test the first gnocchi that you make to ensure that it holds together and that your gnocchi batter isn't too damp.Gently place your gnocchi in the simmering water. It will sink and then bob to the top. From the time that it bobs to the surface, you want to cook the gnocchi until it's just firm. This could take 3 to 5 minutes.
If your gnocchi begins to fall apart, this means that the ricotta cheese was probably still too wet. You can remedy this by beating a teaspoon of egg white into your gnocchi batter. If your gnocchi batter was fluffy but the sample comes out heavy, add a teaspoon of beaten egg to the batter and beat that in. Test a second gnocchi to ensure success.
Form the rest of your gnocchi. You can put 4 to 6 gnocchi in the bed of flour at a time. But don't overcrowd your bed of flour or you may damage your gnocchi as you coat them.Have a sheet pan ready to rest the formed gnocchi on. Line the sheet pan with wax or parchment paper and dust it with flour.You can cook the gnocchi right away, however, Judy Rodgers recommends storing them in the refrigerator for an hour prior to cooking to allow them to firm up.
In the largest pan or pot that you have (make sure it's wide), bring at least 2 liters of water to a boil. You need a wide pot or pan so that your gnocchi won't bump into each other and damage each other. Once the water is boiling, salt it generously. Drop the gnocchi into the water one by one. Once they float to the top, cook them for 3 to 5 minutes (as in the case with the test gnocchi).

Freezing the gnocchi: If you don't want to cook your gnocchi right away or if you don't want to cook all of them, you can make them and freeze them. Once they are formed and resting on the flour-dusted, lined tray, place them uncovered in the freezer. Leave them for several hours to freeze. Once frozen, place them in a plastic bag. Remove the air and seal the bag. Return to the freezer. To cook frozen gnocchi, remove them from the bag and place individually on a plate or on a tray. Place in the refrigerator to thaw completely. Cook as directed for fresh gnocchi.

For the gnocchi sauce (autumn style):

  • about 250g of pumpkin puree (for example hokkaido)
  • 2 chopped spring onion
  • two big slices of ham, diced (in my case panchetta)
  • two tablespoons of tomato puree
  • 1/2 teaspoon chili powder, salt and pepper


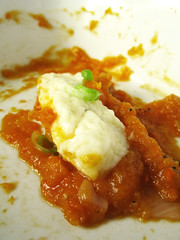
Steam the ham, chili powder and the onions in olive oil until the onions become soft. Add the pumpkin and tomato puree and some water (or if you like wine) and let it simmer for about five minutes. Season with salt and pepper.


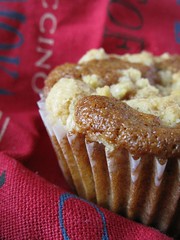
Walnuß-Ahornsirup-Muffins

Beim Stöbern habe ich erst kürzlich wieder ein interessantes Muffinrezept entdeckt. Dabei konnte ich gleich meinen Ahornsirup verwerten, der schon seit Monaten im Kühlschrank steht. Ganz hat es nicht gereicht, die restlichen 40 g habe ich mit Zuckerrübensirup ersetzt - der war noch von der Weihnachtsbäckerei übrig. Gleiches gilt für den Schmand (im Originalrezept sauere Sahne), da der Becher nur 200g enthält, mußte für die restlichen 25g der gute griechische Joghurt dran glauben.


Walnuß-Ahornsirup- Muffins

ergibt ca 18 Stück

Teig:

  • 120g Butter, Raumtemperatur
  • 230g Ahornsirup
  • 2 große Eier
  • 225g Schmand
  • 1 TL Vanilleextrakt
  • 200g Mehl
  • 1 TL Natron
  • 2 TL Backpulver
  • 1/2 TL Salz
  • 1/2 TL Zimt
  • 32g grob gehackte Walnüsse

Die Butter und den Ahornsirup mit dem Mixer zu einer einheitlichen Masse zusammenschlagen. Die Eier einzeln unterschlagen, danach Extrakt und Schmand dazugeben. Die trockenen Zutaten mischen und unter die feuchten rühren. Zum Schluß die Walnüsse unterheben. Die Muffinförmchen zur Hälfte füllen.

Für die Streusel:

  • 90g brauner Zucker
  • 50g Mehl
  • 45g Butter
  • 32g fein gehackte Walnüsse
  • 1/2 TL Zimt

Die Zutaten mit den Händen verkneten bis die gewünschte streuselartige Konsistenz erreicht wird, eventuell noch etwas Mehl dazugeben. Auf den Muffins verteilen. Im vorgeheizten Backofen bei 175°C 10-15 Minuten backen.