The Daring Bakers September challenge: Puff pastry dough and Vols-au-Vent

The September 2009 Daring Bakers' challenge was hosted by Steph of A Whisk and a Spoon. She chose the French treat, Vols-au-Vent based on the Puff Pastry recipe by Michel Richard from the cookbook Baking With Julia by Dorie Greenspan.

I knew this day would come. I knew there would be a time when I had to try a puff pastry myself, but I didn't know it would be that soon ... Roberts first comment on that issue: "Do we have some earplugs so that I don't need to hear your screaming from the kitchen?". Yeahh, I felt like screaming - how am I gonna to do that? Somehow I managed it at the end ... I found out that I just needed patience (and I don't own much of it which was the real challenge for me). I used 2/3 of the remaining dough for a tart with the chicken-filling (mixed with an egg and coverd with cheese) and 1/3 for a completely self-made banana tarte tatin (adapted from here, used my self-made caramel-sauce instead). The tarte tatin was incredible and I was in dessert heaven. Thank you Steph for making me try, the tarte was a hundred times worth it!


Michel Richard's Puff Pastry Dough

From: Baking with Julia by Dorie Greenspan
Yield: 2-1/2 pounds dough

There is a wonderful on-line video from the PBS show "Baking with Julia" that accompanies the book. In it, Michel Richard and Julia Child demonstrate making puff pastry dough (although they go on to use it in other applications). They do seem to give slightly different ingredient measurements verbally than the ones in the book…I listed the recipe as it appears printed in the book.

Ingredients:
(1/3 of the puff pastry recipe will yield about 8-10 3,8 cm Ø vols-au-vent or 4 10,2 cm Ø vols-au-vent)

  • 2-1/2 cups (12.2 oz/ 354 g) unbleached all-purpose flour
  • 1-1/4 cups (5.0 oz/ 142 g) cake flour
  • 1 tbsp. salt (you can cut this by half for a less salty dough or for sweet preparations)
  • 1-1/4 cups (10 fl oz/ 300 ml) ice water
  • 1 pound (16 oz/ 454 g) very cold unsalted butter
  • plus extra flour for dusting work surface
Mixing the Dough:

Check the capacity of your food processor before you start. If it cannot hold the full quantity of ingredients, make the dough into two batches and combine them. Put the all-purpose flour, cake flour, and salt in the work bowl of a food processor fitted with a metal blade and pulse a couple of times just to mix. Add the water all at once, pulsing until the dough forms a ball on the blade. The dough will be very moist and pliable and will hold together when squeezed between your fingers. (Actually, it will feel like Play-Doh.) Remove the dough from the machine, form it into a ball, with a small sharp knife, slash the top in a tic-tac-toe pattern. Wrap the dough in a damp towel and refrigerate for about 5 minutes.
Meanwhile, place the butter between 2 sheets of plastic wrap and beat it with a rolling pin until it flattens into a square that's about 1" (2,5 cm) thick. Take care that the butter remains cool and firm: if it has softened or become oily, chill it before continuing.

Incorporating the butter:
Unwrap the dough and place it on a work surface dusted with all-purpose flour (A cool piece of marble is the ideal surface for puff pastry) with your rolling pin (preferably a French rolling pin without handles), press on the dough to flatten it and then roll it into a 10" (25 cm) square. Keep the top and bottom of the dough well floured to prevent sticking and lift the dough and move it around frequently. Starting from the center of the square, roll out over each corner to create a thick center pad with "ears," or flaps.
Place the cold butter in the middle of the dough and fold the ears over the butter, stretching them as needed so that they overlap slightly and encase the butter completely. (If you have to stretch the dough, stretch it from all over; don't just pull the ends) you should now have a package that is 8'' (20cm) square.
To make great puff pastry, it is important to keep the dough cold at all times. There are specified times for chilling the dough, but if your room is warm, or you work slowly, or you find that for no particular reason the butter starts to ooze out of the pastry, cover the dough with plastic wrap and refrigerate it . You can stop at any point in the process and continue at your convenience or when the dough is properly chilled.

Making the Turns:
Gently but firmly press the rolling pin against the top and bottom edges of the square (this will help keep it square). Then, keeping the work surface and the top of the dough well floured to prevent sticking, roll the dough into a rectangle that is three times as long as the square you started with, about 24" (61 cm) (don't worry about the width of the rectangle: if you get the 24", everything else will work itself out.) With this first roll, it is particularly important that the butter be rolled evenly along the length and width of the rectangle; check when you start rolling that the butter is moving along well, and roll a bit harder or more evenly, if necessary, to get a smooth, even dough-butter sandwich (use your arm-strength!).
With a pastry brush, brush off the excess flour from the top of the dough, and fold the rectangle up from the bottom and down from the top in thirds, like a business letter, brushing off the excess flour. You have completed one turn.
Rotate the dough so that the closed fold is to your left, like the spine of a book. Repeat the rolling and folding process, rolling the dough to a length of 24" and then folding it in thirds. This is the second turn.


Chilling the Dough:
If the dough is still cool and no butter is oozing out, you can give the dough another two turns now. If the condition of the dough is iffy, wrap it in plastic wrap and refrigerate it for at least 30 minutes. Each time you refrigerate the dough, mark the number of turns you've completed by indenting the dough with your fingertips. It is best to refrigerate the dough for 30 to 60 minutes between each set of two turns.
The total number of turns needed is six. If you prefer, you can give the dough just four turns now, chill it overnight, and do the last two turns the next day. Puff pastry is extremely flexible in this regard. However, no matter how you arrange your schedule, you should plan to chill the dough for at least an hour before cutting or shaping it.

Making the vols-au-vent

In addition you will need:

  • egg wash (1 egg or yolk beaten with a small amount of water)
  • your filling of choice (mine see recipe below)
Smoked-chicken-bell pepper-leek-filling

  • meat of one smoked chicken leg, cut into small pieces
  • one leek, divided in halves and cut in stripes
  • 5 small filled hot pepper bells in oil
  • 1 pepper bell, diced
  • 125 g sour cream
  • 125 g joghurt
  • salt & pepper
Line a baking sheet with parchment and set aside.
Using a knife or metal bench scraper, divided your chilled puff pastry dough into three equal pieces. Work with one piece of the dough, and leave the rest wrapped and chilled. (If you are looking to make more vols-au-vent than the yield stated above, you can roll and cut the remaining two pieces of dough as well…if not, then leave refrigerated for the time being or prepare it for longer-term freezer storage. See the "Tips" section below for more storage info.)
On a lightly floured surface, roll the piece of dough into a rectangle about 1/8 to 1/4-inch (3-6 mm) thick. Transfer it to the baking sheet and refrigerate for about 10 minutes before proceeding with the cutting.
(This assumes you will be using round cutters, but if you do not have them, it is possible to cut square vols-au-vents using a sharp chef's knife.) Using a ¾-inch cutter for small vols-au-vent, or a 2- to 2.5-inch round cutter for large, cut centers from half of the rounds to make rings. These rings will become the sides of the vols-au-vent, while the solid disks will be the bottoms. You can either save the center cut-outs to bake off as little "caps" for you vols-au-vent, or put them in the scrap pile.
Dock the solid bottom rounds with a fork (prick them lightly, making sure not to go all the way through the pastry) and lightly brush them with egg wash. Place the rings directly on top of the bottom rounds and very lightly press them to adhere. Brush the top rings lightly with egg wash, trying not to drip any down the sides (which may inhibit rise). If you are using the little "caps," dock and egg wash them as well.
Refrigerate the assembled vols-au-vent on the lined baking sheet while you pre-heat the oven to 400ºF (200ºC). (You could also cover and refrigerate them for a few hours at this point.)

Once the oven is heated, remove the sheet from the refrigerator and place a silicon baking mat (preferred because of its weight) or another sheet of parchment over top of the shells. This will help them rise evenly. Bake the shells until they have risen and begin to brown, about 10-15 minutes depending on their size. Reduce the oven temperature to 350ºF (180ºC), and remove the silicon mat or parchment sheet from the top of the vols-au-vent. If the centers have risen up inside the vols-au-vent, you can gently press them down. Continue baking (with no sheet on top) until the layers are golden, about 15-20 minutes more. (If you are baking the center "caps" they will likely be finished well ahead of the shells, so keep an eye on them and remove them from the oven when browned.)
Remove to a rack to cool. Cool to room temperature for cold fillings or to warm for hot fillings.
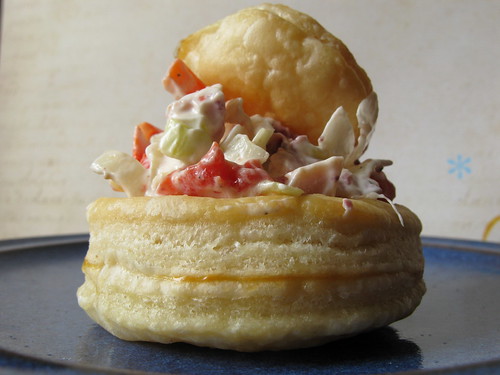
For the filling mix sour cream, joghurt, 2 tblsp of the hot pepper bell oil and the hot pepper bell filling. Season with salt and pepper. Add the chicken, leek and diced pepper bells. Fill into the vols-au-vents and enjoy.
Nudelauflauf 3P* (* Pfifferlinge, Porree und Pute)

Es war mal wieder Zeit für Nudeln, insbesondere nachdem ich beim Italiener wieder ein paar interessante Sorten erstanden hatte, unter anderem auch diese hier. Außerdem hatte ich beim Einkaufen einen Korb Pfifferlinge erspäht, und da ich die Pfifferlingssaison nicht einfach so nahtlos an mir vorüberziehen lassen wollte, wurde dieser auch eingepackt. Zum Schluß fanden sie sich mit Pute und Porree zusammen und ergaben einen leckeren Auflauf.

für 3-4 Personen
  • 400 g Putenfiletstück
  • zwei Stangen Porree, längs halbiert und in Scheiben geschnitten
  • 500 g Pfifferlinge
  • 125 ml Sahne
  • 125 g Schmand
  • 100 g Emmentaler, gerieben
  • 1 Ei
  • 250 g Pasta, zB Fusilli lunghi bucati
  • Thymian, Salz und Pfeffer

Das Fleisch in 2 cm dicke Scheiben schneiden und mit Salz und Pfeffer von beiden Seiten würzen. In Olivenöl kross anbraten. Aus der Pfanne nehmen und zur Seite stellen. Den Fleischsaft in der Pfanne lassen und den Porree darin anbraten. Die Pfifferlinge dazugeben und ca 7 Minuten weiterdünsten. Inzwischen die Nudeln nach Packungsanleitung zubereiten. Die Soße mit Thymian, Salz und Pfeffer würzen und 2/3 der Sahne, Schmand und Ei einrühren, dabei darauf achten dass das Ganze nicht kocht, da sonst das Ei ausflockt. Nochmal abschmecken. Die Nudeln untermengen, dann in eine große Auflaufform geben, die Filetscheiben auf die Nudeln legen und etwas hineindrücken. Mit der restlichen Sahne übergießen und dem Käse bestreuen. Im Backofen bei 180°C für ca. 20 Minuten überbacken.


Kürbis-Currysoße

Was macht man mit unglaublich vielen Kürbissen? Genau, erstmal im Keller der Eltern zwischenlagern. Wenn dann da aber der Platz eng wird, muß man ein oder zwei zwangsläufig verarbeiten. Es folgt der Versuch eine (haltbare) Soße herzustellen, die ohne Probleme wenn immer benötigt hervorgeholt und verwendet werden kann wie zB für eine schnelle Variante meines Puten-Kürbis-Currys (ohne Kürbisstücke versteht sich).

ergibt 3 mittelgroße oder 5 kleine Gläser
  • 800 g Hokkaido-Kürbis, gut zerkleinert
  • eine große Zwiebel, gehackt
  • zwei gehäufte TL rote Currypaste
  • 500 ml Kokosmilch
  • 125 g Erdnussbutter
  • Salz
Den Kürbis in Würfel schneiden und am besten mit der Küchenmaschine 'zerhäckseln'. Die Zwiebel zusammen mit der Currypaste in etwas Öl anbraten, dann den Kürbis unterrühren und ca 10 Minuten weiterdünsten bis er glasig wird, wenn notwendig Öl nachgießen. Die Kokosmilch einrühren und weitere 10 Minuten auf kleiner Flamme köcheln lassen.


Mit einem Pürierstab zu einer Soße verarbeiten. Die Erdnußbutter darin auflösen und mit Salz würzen. Wenn notwendig mit nochmal mit Salz, Currypaste oder Erdnußbutter abschmecken. Noch zwei Minuten kochen lassen und heiß in Gläser abfüllen.

Nachtrag: Heute mußten aus Sicherheitsgründen alle Gläser im Müll verschwinden, da sich die Deckel etwas gehoben hatten. Wahrscheinlich ist die Soße in dieser Zusammensetzung nur ca eine Woche im Kühlschrank haltbar. Schade!

Buttermilch-Panna cotta Teil II - Zitronencreme-Buttermilch Panna cotta-Törtchen

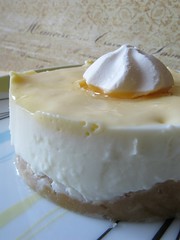
Über einen meiner Lieblingsblogs, Cannelle et Vanille und die Entdeckung des Lemon Curd and Buttermilk Panna Cotta Cake von Aran, die dieses Blog schreibt, bei Design sponge hatte ich ja schon berichtet. Nachdem unzählige Varianten des Panna cottas hergestellt hatte, wollte ich mich auch an den Kuchen wagen. Bei den eher warmen Temperaturen wollte ich aber keinen Teig backen, sondern einen "Keksboden" herstellen; und da mir bis jetzt noch nie Baiser gelungen ist, habe ich fertiges verwendet.


Boden:

  • 200g Buttergebäck, fein zerkrümelt
  • 15 g gemahlene Mandeln
  • 105 g Butter, geschmolzen
Die Krümel, Mandeln und Butter mischen und in eine Kuchenform oder kleine Dessertringe streichen. Falls die Ringe oder die Form nicht ganz dicht sind, vorher mit Frischhaltefolie auslaufsicher auslegen. Im Kühlschrank fest werden lassen (dauert ca eine Stunde).

Panna cotta:

  • 250 ml Sahne
  • 55 g Zucker
  • 2 Blätter Gelatine
  • 125 ml Buttermich
Das Panna cotta abkühlen lassen, dann in die Form bzw Ringe gießen. Im Kühlschrank fest werden lassen (ca 2 Stunden).

Zitronencreme:

  • 3 Eier
  • abgeriebene Schale einer Zitrone
  • 100 g Zucker
  • 160 g Zitronensaft
  • 1 Blatt Gelatine
  • 150 g kalte Butter, in kleine Würfel geschnitten
Zitronenschale, Zucker und Eier in einer Schüssel aufschlagen, den Zitronensaft unterrühren. Die Schüssel in ein Wasserbad setzten und erhitzen, die Mischung sollte dicker werden und anfangen, beim Rühren Spitzen zu bilden. Inziwschen die Gelatine in kaltem Wasser einweichen lassen. Dann ausdrücken und unter die warme Creme rühren. Mit einem Pürierstab dann die Creme aufschlagen und portionsweise die Butter unterziehen. Die Creme sollte heller und schaumiger werden. In die Form bzw Ringe streichen und ebenfalls erkalten lassen. Mit Baiser dekorieren.

Daring Cooks September Challenge: Indian Dosas (vegan)

The Daring Cooks September Challenge was hosted by Debyi from http://www.healthyvegankitchen.com/. She chose Indian Dosas from the refresh cookbook by Ruth Tal as the challenge.
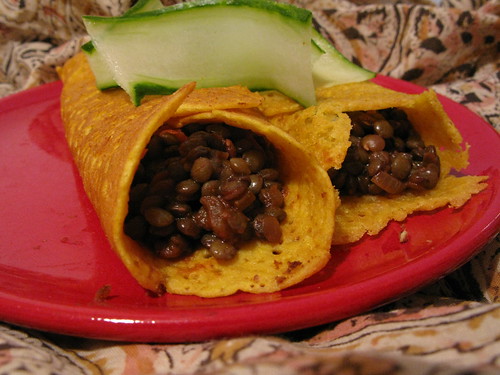
This recipe came in 3 parts, the dosas, the filling and the sauce. It does take awhile to make, but the filling and sauce can be made ahead and frozen if need be. The dosas can be eaten as a main course with rice and veggies, or as an appetizer. We were allowed to use our own filling, the only requirement was that it had to be free of animal products. I decided to make small appetizers - what means just the dosas with some filling. As I don't like chickpeas I decided for a filling wih lentils. I used De Puy lentils - as a matter of fact, I accidentally stepped on them when searching for red lentils (masoor dal). Because they are not getting so soft and taste more like nuts than others I picked them. They are originally coming from France and are also very suitiable for salads (I remember I had them as a salad with thyme and rosemary which was very tasty).

Dosa Pancakes
  • 120 g flour (I used 60 g rice flour and 60 g chickpea flour)
  • ½ tsp (2½ gm) salt
  • ½ tsp (2½ gm) baking powder
  • ½ tsp tumeric powder
  • ½ tsp tandoori masala powder
  • ½ cup (125ml/4oz) coconut milk
  • ¾ cup (175ml/6oz) water
  • cooking spray or oil, if needed
Combine the dry ingredients in a bowl, slowly adding the almond milk and water, whisking until smooth. Heat a nonstick skillet over medium heat. Spray your pan with a thin layer of cooking spray, if needed. Ladle 2 tablespoons of batter into the center of your pan in a circular motion until it is a thin, round pancake. When bubbles appear on the surface and it no longer looks wet, flip it over and cook for a few seconds. Remove from heat and repeat with remaining batter. Makes 8 pancakes.

Lentil filling
  • 250 g lentils (De Puy)
  • one onion, chopped
  • one clove garlic, chopped
  • ginger (half a thumb size), grated
  • ½ tsp chili powder
  • ½ tsp ground cumin
  • 1 tsp garam masala
  • (1 tsp red curry paste)
  • 2 tsp tamarind paste
  • eight tomatoes, cut in eights
  • 150 ml tomato puree
  • salt
Cook the lentils in 1 l of water for about 20 minutes. Meanwhile steam the onions with the cumin, chili powder and garam masala until they are soft. Add garlic and ginger and stew for another minute. Add the tomatoes and boil on medium heat for about five minutes. Add the tamarind paste and the tomato puree. You should get a sauce-like consistency. Mix the cooked lentils with the sauce and season with salt and red curry paste. Boil on small heat for five minutes until most of the sauce is absorbed by the lentils.

Robert liked both the dosas and the filling. I had to keep an eye on the plate because some of the dosas dissappeared while I was waiting for the filling to finish ... The filling is also great as a single dish or with rice (if you have some left).

Buttermilch-Panna Cotta Teil I - Desserts mit Löffelbisquit und Himbeeren

Einen meiner Lieblingsblogs den ich regelmäßig lese ist Cannelle et Vanille. Neulich hatte Aran, die diesen Blog schreibt einen 'Gastauftritt' bei Design sponge ("a daily website dedicated to home and product design"). Dort schaue ich auch öfters vorbei, unter der Rubrik 'in the kitchen with ...' hatte ich schon manches leckere Rezept entdeckt, zB auch das für die Walnuß-Ahornsirup-Muffins. Diesmal war ich über den Lemon Curd and Buttermilk Panna Cotta Cake sogar noch mehr begeistert. Ich liebe Panna cotta, aber bis jetzt sind alle meine Versuche eins geschmacklich wie aus dem Laden/Restaurant zu reproduzieren gescheitert. Die Herstellung hörte sich aber simpel an und durch die Butermilch schien es auch nicht zu süß und schwer zu sein.

Meine wilde Leidenschaft für süße Nachspeisen nach einem herzhaften Mahl ist (zumindest Robert) hinlänglich bekannt, und falls ich nicht dazu komme, sorgt er auch für Nachschub in Form von diversen Arten Joghurt, Vanillecreme oder Quark. Falls ich nämlich einmal nichts davon im Kühlschrank vorfinde, kann das schon zu schlechter Laune führen, und wer will schon einen nach Süßem gierenden fauchenden Drachen in seiner Küche haben ;). Man kann es schon als Ritual bezeichnen dass ich auch zur Arbeit immer einen Joghurt oder ähnliches mitnehmen muss.

Das Panna cotta schien zur Befriedigung meiner Gelüste bestens geeignet und wurde sogleich ausprobiert, was dazu führte dass ich sofort davon abhängig wurde. Ich habe seitdem nur noch das gegessen, in verschiedensten Variationen - mit Beeren oder mit Zitronenbeigabe. Nun wollte ich diese Köstlichkeit auch mit auf Arbeit nehmen, also wurde sie in ein Glas mit Deckel gefüllt (bloß gut dass ich immer so viele Sachen aufhebe). Als Krönung gab es dazu noch frische Himbeeren und Löffelbisquit:

Buttermilch-Panna cotta-Desserts mit Löffelbisquit und Himbeeren
reicht für ca 5 kleine Gläser

  • 5 Stck Löffelbisquit
  • 2 EL Limoncello (ersatzweise Zitronensaft)
  • 250 g Himbeeren
  • 250 ml Sahne
  • 55 g Zucker
  • 2 Blätter Gelatine
  • 125 ml Buttermich
Den Löffelbisquit in Stücke brechen und mit je einer Stange den Boden eines Glases bedecken. Mit Limoncello beträufeln. Dann die Himbeeren gleichmäßig in die Gläser verteilen.
Die Gelatine in kaltem Wasser einweichen. Die Sahne zusammen mit dem Zucker erwärmen (das Ganze sollte nicht kochen), darin dann die ausgedrückte Gelatine auflösen, dabei immer gut rühren. Zum Schluß die Buttermilch unterrühren. In die Gläser füllen und abkühlen lassen, danach im Kühlschrank für 3-4 h fest werden lassen.

Kürbisgnocchi mit Ricotta-Basilikum-Dressing

Nachdem immer noch ungefähr 15 Kürbisse im Keller meiner Eltern lagern und auch einige noch im Garten auf ihre Ernte warten, mussten neue kreative Ideen zur Verarbeitung her. Nachdem ich mich bereits einmal schon erfolgreich an Gnocchi erprobt hatte (die Ricotta Gnocchi der ersten Daring cooks challenge), wollte ich auch etwas Kürbis zu Gnocchis verarbeiten. Das Internet bietet einige Rezepte, mit welchen ich aber nie ganz zufrieden war, also nutzte ich nur die ungefähren Mengenangaben. Das Ergebnis war relativ (kürbis)geschmacksarm, aber im Vergleich zu den normalen käuflichen Gnocchi trotzdem besser. Wer als eine Speise mit Kürbis aber weniger intensivem Kürbisgeschmack möchte, ist mit diesem hier gut beraten. Die Soße war diesmal eine kalte Variante.
Für die Gnocchi:
  • 300 g Hokkaido-Kürbis
  • 300 g Kartoffeln
  • Salz und Pfeffer
  • 1 Ei
  • 75 g Mehl und etwas zum Arbeiten
  • 30 g frisch geriebener Parmesan
Kürbis vierteln, entkernen und in 3 cm dicke Spalten schneiden. Auf einem Blech im vorgeheizten Ofen bei 200 Grad (Umluft 180 Grad) auf der mittleren Schiene 30 Min. backen lassen. Die Kartoffeln schälen und 20 Minuten weich kochen. Kürbis und Kartoffeln in einer Schüssel mit dem Kartoffelstampfer zerdrücken. Mit Salz, Pfeffer und Muskat würzen. Ei und Mehl (in Portionen nacheinander) und dann den Parmaesan solange zugeben und kneten bis der Teig weich, glatt und noch etwas klebrig ist. Kürbisteig auf einer bemehlten Fläche zu einer Rolle von ca. 40 cm Länge rollen. Mit einem scharfen Messer in 2 cm große Scheiben schneiden. Falls der Teig zu klebrig ist, kann man auch Mehl etwa 3 cm hoch in einen tiefen Teller füllen, die Teigmasse mit einem kleinen Löffel abstechen und ins Mehl gleiten lassen, ringsherum damit bedecken und dann die Gnocchi ausformen.

Reichlich Salzwasser zum kochen bringen und die Gnocchi darin 4 Min. kochen.

Für das Dressing:
  • 125 g Ricotta
  • 70 g Creme double
  • Salz und Pfeffer
  • eine Handvoll Basilikumblätter
  • Saft und abgeriebene Schale einer halben Zitrone
Die Zutaten mischen und mit Salz und Pfeffer abschmecken.
Die heißen Gnocchi mit dem Dressing bedecken und mit halbierten Kirschtomaten servieren.

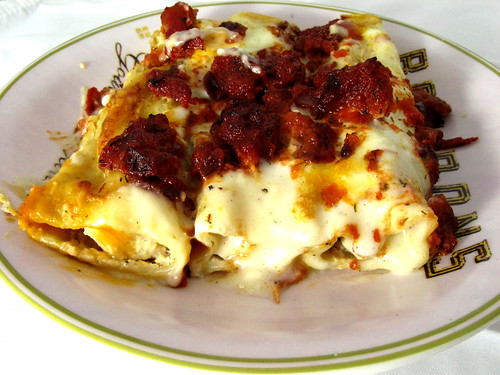
Canneloni mit Lachsfüllung

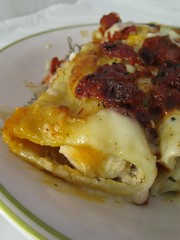
Ja, ich liebe Nudeln, besonders gefüllt und/oder überbacken. In Kombination mit Fisch schien mir dieses Rezept besonders verführerisch - meine Erwartungen waren nur etwas zu hoch, denn der Fisch war nachhher in den Canneloni doch recht krümelig und recht geschmacksarm. Vielleicht hätte ich einfach frischen verwenden müssen und keine Tiefkühlware ...
  • 500 g Lachsfilet (ohne Haut)
  • zwei große Tomaten oder eine Dose gehackte Tomaten
  • eine Zwiebel
  • Olivenöl, Salz und Pfeffer
  • 2 EL Butter
  • 30 g Mehl
  • 3/8 l (375 ml) Milch
  • 1/8 l (125 ml) Gemüsefond
  • 1 EL Zitronensaft
  • ein Bund Dill, gehackt
  • 250 g Schmand
  • 14-16 Canneloni
  • 125 g Mozzarella
Füllung
Den Lachs waschen und ca 30 Minuten anfrieren (tiefgekühlten etwas antauen lassen). Dann mit dem Schmand und 2 EL eiskaltem Wasser im Mixer pürieren, mit Salz, Pfeffer und Dill abschmecken. In die Canneloni füllen (geht am besten mit einem Spritzbeutel).

Tomaten-/Bechamelsoße
Für die Bechamelsoße die Butter zerlassen und das Mehl darin kurz anschwitzen, dann die Brühe und den Fond zugeben und gut rühren, damit sich keine Klumpen bilden. Fünf Minuten köcheln lassen (dann verliert sich der mehlige Geschmack). Mit Salz, Peffer und Zitronensaft abschmecken. Eine schnellere aber leider auch kalorienhaltigerere Variante geht so: Eine Handvoll frisch geriebener Parmesan mit einem Becher Creme fraiche und einem Ei mischen, mit Zitronensaft, Salz Pfeffer und wenn gewünscht Sardellenpaste abschmecken - je nach benötigter Menge die Zutaten verdoppeln.
Für die Tomatensoße die Zwiebeln anbraten, Tomaten dazugeben und kochen bis alles weich ist, ebenfalls mit Salz und Pfeffer abschmecken. Wer möchte, kann gerne noch etwas Knoblauch und Chili dazugeben und mit Balsamicoessig abschmecken. Den Rest Dill darunter rühren.
Den Backofen auf 175°C vorheizen. Einen Teil der Bechamelsoße in eine eckige Auflaufform streichen. Die Canneloni darauf dicht an dicht schichten, den Rest der Soße darübergießen. Mit Mozzarella belegen und dann zum Schluß die Soße daraufgeben. Im Ofen 40-45 Minuten backen.