Posts mit dem Label Tartes and Pies werden angezeigt. Alle Posts anzeigen

Fridays with Beatrice: Mushroom and potato tartlets & baked apples

Being in week 39 of my pregnancy, I am finally able to eat 'nearly normal' again. I still do have heartburns and some digestive issues, but not as worse as before. The only thing that prevents me from large cooking and baking sessions are my feet and my large belly that is always in my way. This is pretty dangerous because I need to be careful not to burn it with hot baking trays for example. Nevertheless I had to make something and Lena chose the ultimate comfort food this week, especially according to the wet and cold weather we have right now. The first course were mushroom and potato tartlets. "Uhhh, something vegetarian. It will taste like nothing just with potatoes and mushrooms ..." my hubby claimed when I told him what we would have for friday nights dinner. I got a little bit mad, in my opinion even blank potatoes are not tasteless. I remembered a pizza I made with potatoes and rosemary (and a bread as well) and those things were far away from tasteless!
"Well, at least, there is cheese on top." he said when he had a first glimpse at them. He loves things topped with cheese, and I used our favourite goat cream cheese for the tartelets. They must have been good, because he ate them without any more complaints ...
In my opinion there were lots of flavours, especially because I bought fresh brown bellybutton mushrooms and chars. Instead of leek, shallots and garlic (which would have been to much for my digestive system) I went for spring onions. The whole tartelet was tasting really good, the only thing that bothered me was the dough (which was crumbly, I guess because of the gluten-free flours) and the whole assembly process. It takes time to prebake the crust, fry the mushrooms and cook the potatoes, so this is no quick meal. I made 6 small tartlets (3 for one of us) and I felt stuffed after eating mine. Bea suggests a salad as accompaniment, but this would have been too much for me.


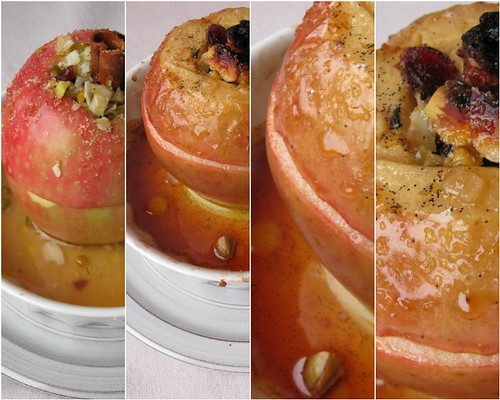
There had to be some space left for those delicious baked apples. I usually only make baked apples around christmas, filled with almond paste, nuts and cinnamon. The recipe wasn't reminding me of christmas at all, so I was curious how it would taste. It was another recipe that took time, because you have to make an infusion of apple and lemon juice, lemon zest and a vanilla bean first. The apples are then filled with a mixture of pistacios, almonds and cranberries, a cinnamon stick is put in the middle, then they are 'drained' in the infusion and topped with some olive oil and sugar. The supposed baking time is an hour, mine were done in about 40 minutes. You need to keep an eye on them, one of my apples "exploded" (split in half ), and the infusion became a thick caramel-like sauce which nearly burned. They were fabulous anyway. I served them with cold vanilla sauce - what I always do, but I think vanilla ice cream would have been even better.


Roundup: Tartlets - Nice comfort food for cold days, especially if you want something vegetarian.
Baked apples - Yummy! Something to make over and over again, regardless the season. I need to create a BBQ version ...or serve them with vanilla ice cream next time ...

Fridays with Beatrice - Apricot tartlets with honey and olive oil

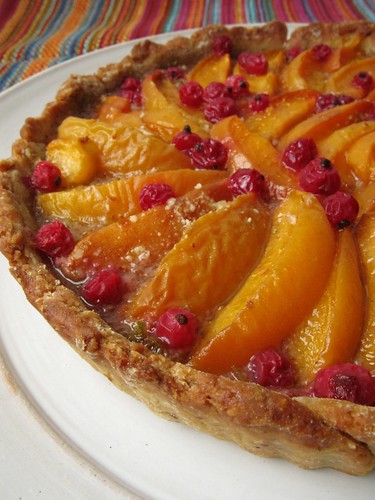
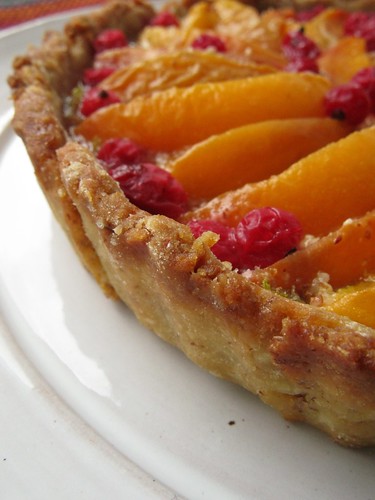
It was my time to chose again, and I decided for something sweet. I hadn't made a tarte in a while, so I wanted to give it another try. This recipe sounded interesting, and as I had the luck tu get some goog quality apricots, it should be this one. My biggest fear is always the crust, especially when it comes to rolling out and transferring the dough without it falling apart. I was a little bit sceptical about the flour and olive oil combination. I finally got some quinoa and amaranth flour so I can try the gluten-free stuff, but unfortunately I am still searching for xantham gum; so I had to replace some flour (in this case millet) with some all purpose flour. Rolling and transferring was easy this time. The sugar-almond-lime mixture you put on the crust before adding the fruit was new and suprisingly enhancing the taste of the fruits. I recommend  using the red currants as supposed in the recipe, they go really well with the apricot flavour. The only thing I dind't like at the finishet tartelet was the strong olive oil flavour coming throuch every bite - maybe that's just my opinion, it took a long time before I could get used to olive oil and its flavour and started using it into my kitchen...


Lena had her troubles too (which started with buying apricots) -  I think apricots and red currants taste great 'cooked through' in this case but I missed a special something about this recipe.

Roundup: Nice flavour- and fruit combination, but next time I'd prefer another crust.

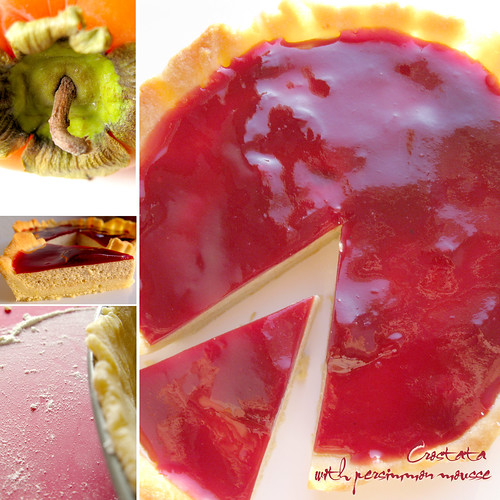
Daring Bakers November challenge: Crostata filled with persimmon mousse and raspberry jam

The 2010 November Daring Bakers' challenge was hosted by Simona of briciole. She chose to challenge Daring Bakers' to make pasta frolla for a crostata. She used her own experience as a source, as well as information from Pellegrino Artusi's Science in the Kitchen and the Art of Eating Well.

Crostata (tart) is an Italian dessert. The base of a crostata is pasta frolla(or pastafrolla), sweet short crust pastry (or sweet tart dough) made of flour, sugar, butter and eggs. Pasta frollais versatile: it provides the base to make crostata with fruit preserves, pastry cream, fresh fruit,ricotta, and other ingredients, and, by itself, it makes very nice cookies.

Tarte should be a piece of cake for me, made them a dozen times, you can find them all here. I wasn't so fond of the idea of a whole sweet jam filling*, so I rather preferred blind baking and adding a filling afterwards. There are masses of possibilities for filling, I once for example made an apple cinnamon ice cream filling and topped it with marzipan. But I was looking for something new. I remembered a dessert recipe from one of my friends I liked very much. It's an apple mousse which is topped with a chocolate mousse or elderberry sauce. Apple seemed a little bit to plain so wanted something more fancy. Because I never used persimmons before I decided to gor for a persimmon-raspberry combination. The result was really smooth and tasty but took a lot of time (which involved a lot of waiting but was worth it).

* In Austria such a tarte with jam filling and dough stripes on top for decoration is called 'Linzer Torte'.

Crostata filled with persimmon mousse and raspberry jam


Pflaumen-Apfel-Cobbler

Was macht man wenn man einen Korb Pflaumen erstanden hat und einen die Gelüste nach frischen Früchten nach kurzer Zeit verlassen? Kuchen? Pflaumenknödel nach Omas Spezialrezept? Das gab es doch erst letzte Woche bei Mutti .... Nein, gegen die Pflaumenknödel nach Familienrezept ist wirklich nichts einzuwenden. Meine Oma stammt aus dem ehemaligen Sudetenland und hat viele böhmische Rezepte mit in die Familienküche gebracht, so dass wir manchmal nicht nur sächsisch, sondern auch böhmisch gekocht haben. Jedes Jahr zur Hochsaison der Pflaumenzeit lädt meine Mutter zu Pflaumenknödeln ein, und die ganze Familie versammelt sich um einen Tisch. Die Vorbereitungen dazu laufen bereits Tage vorher und die Mengen die meine Mutter dabei produziert grenzen an die Produktion einer mittelgroßen Fabrik - meistens schaffen wir nur die Hälfe von dem, was in den beiden großen Töpfen gedämpft wurde, und einige Exemplare landen zum Glück in der Gefriertruhe, wo man sie bei Gelegenheit wieder hervorzaubern kann. Serviert werden die Knödel mit einer Pflaumentunke, zerlassener Butter und Zimt und Zucker. Ich liebe diese Geschmackskombination. An die zerlassene Butter konnte ich mich zwar nie so richtig gewöhnen, aber von Tunke mit Zucker und Zimt bekam ich nie genug. Die ganze Prozedur der Herstellung ist mir aber zu aufwändig nur für zwei Personen, ganz zu schweigen von den Dingen, die bei der Herstellung alle schief gehen können. Den Geschmack wollte ich aber wieder in einem Gericht erleben, nur was sollte ich machen?

Außerdem waren da auch noch diese Äpfel die dringend weg müssen. Moment, Äpfel, da war doch was - genau, Apfel-Crumble. Funktioniert das auch mit Pflaumen? Kurze Recherche ...  ja, diese ganzen traditionellen englischen Crumble funktionieren mit fast jeder Fruchtkombination; und als Cobbler kann man sie sogar zum Hauptgang servieren.

Blueberry and lemon curd swirl Tart

I really wanted to post this recipe a long time ago, but like with most small things which get lost very fast the picture and the recipe got lost into the depths of my PC. This tart was basicially a left-over creation. As you may have recognised I'm in love with the lemon curd used in this cake and used it several times making desserts. I had some curd left and thought about using it for a tart filling, but it was supposed to contain some fruits and to be made quick and easy. The only thing I had at hand where some frozen blueberries but the flavour- and colour combination seemed to be promising to me. For the crust I used the (one and only) tart crust recipe which came with one of the Daring Bakers challenges (Bakewell tart).

Crust:
  • 225g all purpose flour
  • 30g sugar
  • ½ tsp salt
  • 110g unsalted butter, cold (frozen is better)
  • 2 egg yolks
  • 2.5ml (½ tsp) almond extract (optional)
  • 1-2 Tbsp cold water
Sift together flour, sugar and salt. Grate butter into the flour mixture, using the large hole-side of a box grater. Using your finger tips only, and working very quickly, rub the fat into the flour until the mixture resembles bread crumbs. Set aside. Lightly beat the egg yolks with the almond extract (if using) and quickly mix into the flour mixture. Keep mixing while dribbling in the water, only adding enough to form a cohesive and slightly sticky dough. Form the dough into a disc, wrap in cling and refrigerate for at least 30 minutes. Place the chilled dough disc on a lightly floured surface. Flour the rolling pin and roll the pastry to 5mm thickness. When the pastry is to the desired size and thickness, transfer it to the tart pan, press in and trim the excess dough. Patch any holes, fissures or tears with trimmed bits. Chill in the freezer for 15 minutes.
Preheat oven to 180°C. Cover the dough with parchment paper and fill with dry peas, beans or rice. This will prevent the dough from rising. Bake for 15 minutes, remove the paper and filling and bake another 10 minutes or until golden brown. Let cool.

Lemon curd:
  • 3 eggs
  • zest of 1 lemon
  • 110 grams sugar
  • 160 grams lemon juice
  • 1 sheet of gelatin
  • 50 grams butter, cut into small cubes
Whisk the eggs, lemon zest and sugar together in a large bowl. Whisk in the lemon juice. Place the bowl over a water bath and whisk constantly until it thickens. It will start to make ribbons. In the meantime, have the gelatin softening in ice water. Squeeze out excess water and when curd has thickened, add the gelatin to the bowl. Strain this curd through a fine sieve into a clean bowl. Using a blender, start mixing the curd and adding the small pieces of butter. The curd will start to change in color and become lighter. Let cool for some hours. (As I had some leftovers, mine was ready for use.)

Blueberry filling:
  • 300 g frozen or fresh blueberries
  • about 6-7 tablespoons dark fruit jam or jelly (blackberry, blueberry or similar)
  • one tabelspoon corn starch (only if you use frozen berries)
Fill the lemon curd into a piping bag and use the curd making circles on the crust, starting on the outside, leaving 2-3 cm wide gaps in between. Fill the gaps with the blueberries or blueberry filling. For the filling, thaw the frozen ones and collect the juice. Mix with the corn starch in a small pot and heat until it thickens. Add the jam, beating so you prevent getting lumps. Let cool and stir in the blueberries. If using the fresh ones, warm the jam afterwards and spread carefully over the fruits.

Apfel-Calvados-Flan-Tarte

Herbst ist Apfelzeit, un da ich die kleinen runden Früchte nicht so gerne pur esse (da kribbelt es gerne mal in meinem Hals), verarbeite ich sie gerne zu Kuchen oder Crumble. Eine Tarte war sowieso überfällig, also warum nicht mit Äpfeln. Ich hatte zwar schon eine mit Karamell ausprobiert, aber danach stand mit nicht gerade der Sinn. In meinem Kopf spukte die Vorstellung von einer Kreation mit Pudding umher ... In einem Video bei einer der letzten Daring Bakers Challenges hatte ich die Herstellung einer Crème pâtissière (oder auch Konditroreme) verfolgt und zu meinem Erstaunen festgestellt, dass diese (eigentlich Vanillepudding-artige) Creme, deretwegen ich so gerne diese mit ihr gefüllten süßen Teilchen vom Bäcker aß, aus nichts weiter bestand als Eier, Milch, Vanille, Zucker und Mehl. Das hatte ich ja alles da! Schnell im Internet nach einem Rezept gesucht ... Das Hindernis waren am Ende nur die Eier, sechs Eigelb, ach herrje! Ich wollte eigentlich erst nur die Hälfte der Menge des gefundenen Rezeptes machen, aber die Mengenangaben einiger Zutaten ließen sich schlecht hälfteln und dritteln, so dass ich mich dann doch an die Originalangaben hielt. Von der Creme braucht man ungefähr drei Viertel, den Rest verwendete ich dann für die Füllung der nächsten Ladung Muffins ... Für den Teig wählte ich das Rezept welches ich in einer Daring Bakers Challenge verwendet hatte, anstatt Wasser nahm ich aber Apfelschnaps (Calvados). Das Ganze ist relativ zeitaufwendig, am Besten fängt man an die Äpfel einzulegen und dann den Teig herzustellen. Während der im Kühlschrank ruht, kann man die Creme zubereiten.


für den Mürbeteig:

  • 225g Mehl
  • ½ TL Salz
  • 110g kalte Butter, in Würfel geschnitten
  • 2 Eigelb
  • 1/2 TL Vanillesirup (optional)
  • 30 g Zucker
  • 1-2 TL Calvados
Mehl, Salz und Zucker mischen. Die Butter mit den Fingerspitzen untermischen bis eine krümelige Masse entstanden ist. Eigelb und Calvados (und Sirup) einarbeiten bis ein schöner glatter Teig eintsteht, wenn notwendig noch etwas Wasser dazugeben. In Frischhaltefolie wickeln und im Kühlschrank eine halbe Stunde ruhen lassen.

für die Crème pâtissière (pastry cream oder Konditorcreme):

  • 6 Eigelb
  • 125 g Zucker
  • 25 g Mehl
  • 480 ml Milch
  • das Mark einer Vanilleschote
Eigelb mit einem Drittel des Zucker zu einer schaumigen Masse schlagen, dann das Mehl unterrühren. Den restlichen Zucker mit dem Mark der Vanilleschote und der Milch in einem Topf erhitzen. Wenn das Ganze kocht, zur Eigelbmischung geben, dabei gut mixen. Zurück in den Topf gießen und aufkochen lassen, für weitere 2 Minuten kochen lassen. In eine Schüssel füllen und zum Abkühlen beiseite stellen - mit Frischhaltefolie bedeckt (die Folie auf die Oberfläche der Creme gelegt) verhindert man dass sich diese häßliche Haut bildet.

für den Belag:
  • 5 mittelgroße säuerliche Äpfel
  • ein Glas Calvados
Die Äpfel schälen, halbieren und das Kerngehäuse entfernen. Mit einem scharfen Messer die Hälften mit parallelen Schnitten in einem Abstand von einem halben Zentimenter einschneiden. Die Apflehälften in einer Schüssel mit dem Calvados übergießen und darin ca eine Stunde ziehen lassen, ab und zu mischen so dass alle Hälften gleichmäßig getränkt werden.


Den Teig ausrollen und eine Tarteform damit auslegen. Den Boden mit der Konditorcreme bestreichen, von der Höhe etas niedriger als die Teigränder. Die Apfelhälften gut abtropfen lassen und mit der flachen Seite auf der Tarte verteilen, dabei gut in die Creme drücken. Im vorgeheizten Backofen bei 180°C (Umluft) 30-35 Minuten backen.

The Daring Bakers September challenge: Puff pastry dough and Vols-au-Vent

The September 2009 Daring Bakers' challenge was hosted by Steph of A Whisk and a Spoon. She chose the French treat, Vols-au-Vent based on the Puff Pastry recipe by Michel Richard from the cookbook Baking With Julia by Dorie Greenspan.

I knew this day would come. I knew there would be a time when I had to try a puff pastry myself, but I didn't know it would be that soon ... Roberts first comment on that issue: "Do we have some earplugs so that I don't need to hear your screaming from the kitchen?". Yeahh, I felt like screaming - how am I gonna to do that? Somehow I managed it at the end ... I found out that I just needed patience (and I don't own much of it which was the real challenge for me). I used 2/3 of the remaining dough for a tart with the chicken-filling (mixed with an egg and coverd with cheese) and 1/3 for a completely self-made banana tarte tatin (adapted from here, used my self-made caramel-sauce instead). The tarte tatin was incredible and I was in dessert heaven. Thank you Steph for making me try, the tarte was a hundred times worth it!


Michel Richard's Puff Pastry Dough

From: Baking with Julia by Dorie Greenspan
Yield: 2-1/2 pounds dough

There is a wonderful on-line video from the PBS show "Baking with Julia" that accompanies the book. In it, Michel Richard and Julia Child demonstrate making puff pastry dough (although they go on to use it in other applications). They do seem to give slightly different ingredient measurements verbally than the ones in the book…I listed the recipe as it appears printed in the book.

Ingredients:
(1/3 of the puff pastry recipe will yield about 8-10 3,8 cm Ø vols-au-vent or 4 10,2 cm Ø vols-au-vent)

  • 2-1/2 cups (12.2 oz/ 354 g) unbleached all-purpose flour
  • 1-1/4 cups (5.0 oz/ 142 g) cake flour
  • 1 tbsp. salt (you can cut this by half for a less salty dough or for sweet preparations)
  • 1-1/4 cups (10 fl oz/ 300 ml) ice water
  • 1 pound (16 oz/ 454 g) very cold unsalted butter
  • plus extra flour for dusting work surface
Mixing the Dough:

Check the capacity of your food processor before you start. If it cannot hold the full quantity of ingredients, make the dough into two batches and combine them. Put the all-purpose flour, cake flour, and salt in the work bowl of a food processor fitted with a metal blade and pulse a couple of times just to mix. Add the water all at once, pulsing until the dough forms a ball on the blade. The dough will be very moist and pliable and will hold together when squeezed between your fingers. (Actually, it will feel like Play-Doh.) Remove the dough from the machine, form it into a ball, with a small sharp knife, slash the top in a tic-tac-toe pattern. Wrap the dough in a damp towel and refrigerate for about 5 minutes.
Meanwhile, place the butter between 2 sheets of plastic wrap and beat it with a rolling pin until it flattens into a square that's about 1" (2,5 cm) thick. Take care that the butter remains cool and firm: if it has softened or become oily, chill it before continuing.

Incorporating the butter:
Unwrap the dough and place it on a work surface dusted with all-purpose flour (A cool piece of marble is the ideal surface for puff pastry) with your rolling pin (preferably a French rolling pin without handles), press on the dough to flatten it and then roll it into a 10" (25 cm) square. Keep the top and bottom of the dough well floured to prevent sticking and lift the dough and move it around frequently. Starting from the center of the square, roll out over each corner to create a thick center pad with "ears," or flaps.
Place the cold butter in the middle of the dough and fold the ears over the butter, stretching them as needed so that they overlap slightly and encase the butter completely. (If you have to stretch the dough, stretch it from all over; don't just pull the ends) you should now have a package that is 8'' (20cm) square.
To make great puff pastry, it is important to keep the dough cold at all times. There are specified times for chilling the dough, but if your room is warm, or you work slowly, or you find that for no particular reason the butter starts to ooze out of the pastry, cover the dough with plastic wrap and refrigerate it . You can stop at any point in the process and continue at your convenience or when the dough is properly chilled.

Making the Turns:
Gently but firmly press the rolling pin against the top and bottom edges of the square (this will help keep it square). Then, keeping the work surface and the top of the dough well floured to prevent sticking, roll the dough into a rectangle that is three times as long as the square you started with, about 24" (61 cm) (don't worry about the width of the rectangle: if you get the 24", everything else will work itself out.) With this first roll, it is particularly important that the butter be rolled evenly along the length and width of the rectangle; check when you start rolling that the butter is moving along well, and roll a bit harder or more evenly, if necessary, to get a smooth, even dough-butter sandwich (use your arm-strength!).
With a pastry brush, brush off the excess flour from the top of the dough, and fold the rectangle up from the bottom and down from the top in thirds, like a business letter, brushing off the excess flour. You have completed one turn.
Rotate the dough so that the closed fold is to your left, like the spine of a book. Repeat the rolling and folding process, rolling the dough to a length of 24" and then folding it in thirds. This is the second turn.


Chilling the Dough:
If the dough is still cool and no butter is oozing out, you can give the dough another two turns now. If the condition of the dough is iffy, wrap it in plastic wrap and refrigerate it for at least 30 minutes. Each time you refrigerate the dough, mark the number of turns you've completed by indenting the dough with your fingertips. It is best to refrigerate the dough for 30 to 60 minutes between each set of two turns.
The total number of turns needed is six. If you prefer, you can give the dough just four turns now, chill it overnight, and do the last two turns the next day. Puff pastry is extremely flexible in this regard. However, no matter how you arrange your schedule, you should plan to chill the dough for at least an hour before cutting or shaping it.

Making the vols-au-vent

In addition you will need:

  • egg wash (1 egg or yolk beaten with a small amount of water)
  • your filling of choice (mine see recipe below)
Smoked-chicken-bell pepper-leek-filling

  • meat of one smoked chicken leg, cut into small pieces
  • one leek, divided in halves and cut in stripes
  • 5 small filled hot pepper bells in oil
  • 1 pepper bell, diced
  • 125 g sour cream
  • 125 g joghurt
  • salt & pepper
Line a baking sheet with parchment and set aside.
Using a knife or metal bench scraper, divided your chilled puff pastry dough into three equal pieces. Work with one piece of the dough, and leave the rest wrapped and chilled. (If you are looking to make more vols-au-vent than the yield stated above, you can roll and cut the remaining two pieces of dough as well…if not, then leave refrigerated for the time being or prepare it for longer-term freezer storage. See the "Tips" section below for more storage info.)
On a lightly floured surface, roll the piece of dough into a rectangle about 1/8 to 1/4-inch (3-6 mm) thick. Transfer it to the baking sheet and refrigerate for about 10 minutes before proceeding with the cutting.
(This assumes you will be using round cutters, but if you do not have them, it is possible to cut square vols-au-vents using a sharp chef's knife.) Using a ¾-inch cutter for small vols-au-vent, or a 2- to 2.5-inch round cutter for large, cut centers from half of the rounds to make rings. These rings will become the sides of the vols-au-vent, while the solid disks will be the bottoms. You can either save the center cut-outs to bake off as little "caps" for you vols-au-vent, or put them in the scrap pile.
Dock the solid bottom rounds with a fork (prick them lightly, making sure not to go all the way through the pastry) and lightly brush them with egg wash. Place the rings directly on top of the bottom rounds and very lightly press them to adhere. Brush the top rings lightly with egg wash, trying not to drip any down the sides (which may inhibit rise). If you are using the little "caps," dock and egg wash them as well.
Refrigerate the assembled vols-au-vent on the lined baking sheet while you pre-heat the oven to 400ºF (200ºC). (You could also cover and refrigerate them for a few hours at this point.)

Once the oven is heated, remove the sheet from the refrigerator and place a silicon baking mat (preferred because of its weight) or another sheet of parchment over top of the shells. This will help them rise evenly. Bake the shells until they have risen and begin to brown, about 10-15 minutes depending on their size. Reduce the oven temperature to 350ºF (180ºC), and remove the silicon mat or parchment sheet from the top of the vols-au-vent. If the centers have risen up inside the vols-au-vent, you can gently press them down. Continue baking (with no sheet on top) until the layers are golden, about 15-20 minutes more. (If you are baking the center "caps" they will likely be finished well ahead of the shells, so keep an eye on them and remove them from the oven when browned.)
Remove to a rack to cool. Cool to room temperature for cold fillings or to warm for hot fillings.
For the filling mix sour cream, joghurt, 2 tblsp of the hot pepper bell oil and the hot pepper bell filling. Season with salt and pepper. Add the chicken, leek and diced pepper bells. Fill into the vols-au-vents and enjoy.

The daring bakers June challenge - Bakewell Tart…er…pudding (also with a local touch)

The June Daring Bakers' challenge was hosted by Jasmine of Confessions of a Cardamom Addict and Annemarie of Ambrosia and Nectar. They chose a Traditional (UK) Bakewell Tart... er... pudding that was inspired by a rich baking history dating back to the 1800's in England.

I found a bakewell tart recipe in one of my Jamie Oliver cookbooks some time ago (I remembered I wanted to bake it but something baffled my plans). Reading through a newly bought recipe/lokal food history-book Culinaria Deutschland I additionally found a verly local kind of bakewell tarte, invented by the bakers of Leipzig. Those little tartelettes are called "Leipziger Lerchen" ("Leipzig larks"). Larks were hunted in thousands in the 17th century, spiked with spices, wrapped into bacon and afterwards fried. They were even sent to Spain or Russia. In 1876 environmental activists obtained a hunting ban for the birds. The tartelettes were invented and thought as substitutes for the real larks, the two dought stripes crossed on top shall symbolise the cord the lark was tied up with.

I was really astonished by this story because it meant there was also a German side of bakewell tart history; and a very local too. Leipzig is a town about 50 km away from my place - if some of you remember 'Faust' from Goethe, the play took place there. Therefore I decided to make "Leipziger Lerchen" too. The result didn't quite look like in the book, but I was proud anyway. I searched the internet for more recipes and found out that there are also lots of varieties - some use strawberry or apricot jam, others no jam at all (like in the book).

makes one 23cm or twelve Tartelettes (if you use muffin moulds) & one small loaf pan

  • One quantity sweet shortcrust pastry (recipe follows)
  • Bench flour
  • 250ml jam or curd (I used my newly made strawberry-lime-jam), warmed for
    spreadability
  • One quantity frangipane (recipe follows)
  • One handful blanched, flaked almonds


Sweet shortcrust pastry
[Modifications for "Leipziger Lerchen"]

  • 225g [250] all purpose flour
  • 30g [85] sugar
  • ½ [1] tsp salt
  • 110g [125] unsalted butter, cold (frozen is better)
  • 2 [one egg] egg yolks
  • 2.5ml (½ tsp) almond extract (optional)
  • 1-2 Tbsp cold water [1 Tbsp Cognac]


(If you wish, you can substitute the seeds of one vanilla bean, one teaspoon of vanilla paste or one teaspoon of vanilla extract for the almond extract.)

Sift together flour, sugar and salt. Grate butter into the flour mixture, using the large hole-side of a box grater. Using your finger tips only, and working very quickly, rub the fat into the flour until the mixture resembles bread crumbs. Set aside. Lightly beat the egg yolks with the almond extract (if using) and quickly mix into the flour mixture. Keep mixing while dribbling in the water, only adding enough to form a cohesive and slightly sticky dough.Form the dough into a disc, wrap in cling and refrigerate for at least 30 minutes.

I have tried lots of shortcrust pastry recipes before, but this one was the perfect one! Not too sticky or didn't crumble or fell apart in pieces.

Frangipane
[Modifications for "Leipziger Lerchen"]


  • 125g [125] unsalted butter, softened
  • 125g [170] icing sugar
  • 3 [one egg yolk, three egg whites] eggs
  • 2.5ml (½ tsp) almond extract
  • 125g [100] ground almonds
  • 30g [75] all purpose flour
  • [1 Tbsp corn starch]


Cream butter and sugar together for about a minute or until the mixture is primrose in colour and very fluffy. Scrape down the side of te bowl and add the eggs, one at a time, beating well after each addition. The batter may appear to curdle. In the words of Douglas Adams: Don't panic . Really. It'll be fine. After all three are in, pour in the almond extract and mix for about another 30 seconds and scrape down the sides again. With the beaters on, spoon in the ground nuts and the flour. Mix well. The mixture will be soft, keep its slightly curdled look (mostly from the almonds) and retain its pallid yellow colour.

Assembling the tart

Place the chilled dough disc on a lightly floured surface. If it's overly cold, you will need to let it become acclimatised for about 15 minutes before you roll it out. Flour the rolling pin and roll the pastry to 5mm (1/4") thickness, by rolling in one direction only (start from the centre and roll away from you), and turning the disc a quarter turn after each roll. When the pastry is to the desired size and thickness, transfer it to the tart pan, press in and trim the excess dough. Patch any holes, fissures or tears with trimmed bits. Chill in the freezer for 15 minutes.
Preheat oven to 200C. Remove shell from freezer, spread as even a layer as you can of jam onto the pastry base. Top with frangipane, spreading to cover the entire surface of the tart.


Modifications for "Leipziger Lerchen": No jam, just the frangipane, and they are made in special moulds similar to muffin moulds. Keep some of the (rolled out) dough and cut it into (about 1 cm wide) thin stripes and cover the tartelettes with two crossed stripes.


Smooth the top and pop into the oven for 30 minutes. Five minutes before the tart is done, the top will be poofy and brownish. Remove from oven and strew flaked almonds on top and return to the heat for the last five minutes of baking.The finished tart will have a golden crust and the frangipane will be tanned, poofy and a bit spongy-looking. Remove from the oven and cool on the counter. Serve warm, with crème fraîche, whipped cream or custard sauce if you wish.When you slice into the tart, the almond paste will be firm, but slightly squidgy and the crust should be crisp but not tough.


Auberginen-Halloumi-Tarte

Wenn es mal wieder schnell gehen soll, kann ich diese leckere Tarte empfehlen - es ist ein etwas abgewandeltes Rezept aus meinem Tarte-Buch, ein bißchen verfeinert und "aufgepeppt", das Ganze läßt sich sicher auch noch mehr nach jeweiligem Geschmack variieren. Die Tarte reicht für zwei Personen.
  • eine halbe Aubergine, in Scheiben geschnitten
  • 250 g Halloumi (oder anderer Grillkäse), in Scheiben geschnitten
  • 5-6 kleine Cocktailtomaten
  • fünf Scheiben Prosciutto
  • 3 EL Pesto alla Calabrese
  • 2 EL Tomatenmark
  • Olivenöl
  • getrockneter Oregano
  • Salz & Pfeffer
  • ein fertiger Blätterteig (rund, Durchmesser 29 cm)
Den Blätterteig auf das Backblech legen und einen ca 2 cm von der Außenkante entfernten Rand einschneiden, dabei nur die oberen zwei Dritten des Teigs schneiden, diese gehen dann auf und bilden einen schönen Rand. Deswegen ist es auch wichtig beim Belegen nicht über den Rand zu kommen. Pesto und Tomatenmark mischen und auf dem Boden verstreichen. Mit den Auberginenscheiben und dem Käse schichtweise belegen. Die Tomaten halbieren und mit der flachen Seite nach unten in evt. entstandene Lücken stecken oder kreuz und quer verteilen. Das Gleiche mit dem Schinken machen, am besten die ganze Scheibe in Wellen legen. Den Belag mit Olivenöl beträufeln, dabei aufpassen dass alle Auberginenscheiben etwas abbekommen. Mit Oregano bestreuen und Salz und Pfeffer würzen. Bei 200°C für 25-30 Minuten in den vorgeheizten Backofen schieben.

Auberginen-Salsiccia-Tarte

Nach neuesten Küchenexperimenten lassen sich jetzt auch die Aubergine und ein Tarteboden kombinieren. Die hatte ich nämlich letztens noch als einzigstes Gemüse da und keine Lust auf Pasta. André möge mich schlagen bei einem Teil der folgenden Zutatenliste aber ICH MAG KETCHUP - außerdem war es BIO-Ketchup (jawohl so etwas gibt es inzwischen auch, dem allgemeinen Bio-Wahn folgend). Wenn ich es irgendwann einmal schaffen sollte selbst Tomaten zu ziehen mache ich den selbstverständlich selber *blinzel*.

Teig:

  • 200 g Dinkelmehl
  • eine Prise Salz
  • 100 g Fett/Butter
  • 1 EL Tomatenmark
  • 1-2 EL kaltes Wasser
Aus den Zutaten einen geschmeidigen Teig formen und in Frischhaltefolie eine halbe Stunde im Kühlschrank ruhen lassen. Danach gleichmäßig ausrollen und die Tartform(en) damit auslegen.

Füllung:

  • eine Aubergine, in ca. 1x1 cm dicke Streifen geteilt (längs), mariniert (wie s. unten)
  • eine Salsiccia (ital. Bratwurst), Darm entfernt und die Füllung in kleine Stücke zerpflückt
  • 150 g Feta, zerkrümelt
  • 100 g Ziegenschnittkäse, gerieben
  • je 1+1 gehäuften TL Oregano und Thymian
  • 2+3 EL Tomatenmark
  • 2+4 EL Tomatenketchup
  • 4 EL Olivenöl
  • Salz und Pfeffer
Je ein TL Oregano, Thymian, 2 EL Ketchup und Tomatenmark, Salz und Pffer sowie das Öl verrühren und die Auberginen mind. 15 Minuten darin marinieren. Dabei acht geben dass die Auberginen überall benetzt sind, evt. etwas Öl nachgeben. Die Streifen dann auf der Tarte verteilen. Aus dem restlichen Mark, Ketchup und den Gewürzen eine Paste rühren. Wer mag kann noch eine geriebene Knoblauchzehe oder etwas Sardellenpaste dazugeben. Die zerpflückte Salsiccia auf der Aubergine verteilen, dann mit Feta und Ziegenkäse bestreuen. Bei 180 °C (Umluft) ca 25-30 Minuten backen - je nach größe der Tarte(s). Ich hatte es mit der Backzeit etwas übertrieben, deswegen ist die Käsekruste recht dunkel geworden.

Zucchini-Krabben-Quiche

Ein neues Quiche-Rezept, eine schöne Kombination mit einigen meiner Lieblingszutaten - Cheddar-Käse oder Krabben zum Beispiel, die Basis der Soße ist eine Mehlschwitze, und obwohl ich diese Art der Soßenzubereitung nicht sehr mag, war das Ergebnis geschmacklich besser als gedacht - aus meinem Tartebuch...

  • 175 g Mürbeteig

  • 40 g gesalzene Butter

  • eine kleine Zucchini, in Stifte geschnitten

  • 25 g Mehl

  • 300 ml heiße Milch

  • 175 g Krabben, geschält, gegart (und aufgetaut)

  • 2 Eier, verquirlt

  • 75 g Cheddar-Käse, gerieben

  • Salz & Pfeffer

Beim Käse reiben kam meine neue Reibe von Mircroplane zum Einsatz, ein tolles Gerät! Die Form mit dem Mürbeteig auslegen und bei 200°C (180°C Umluft) im Ofen blind backen. Inzwischen -

Füllung zubereiten:

Die Zucchini-Stifte in der Butter fünf Minuten weich dünsten. Das Mehl einrühren und eine Minute anschwitzen, dann nach und nach die heiße Milch angießen und unter ständigem Rühren zu einer glatten Sauce kochen. Das Ganze etwas abkühlen lassen, dann die Krabben, Eier und 50 g des Käses unterrühren. Mit Salz und Pfeffer abschmecken. In die Form geben und mit dem restlichen Käse bestreuen. Bei 190°C (Umluft 175 °C) noch 25 Minuten backen, bis der Käse braun ist. Da ich wie immer etwas Teig und Füllung übrig hatte entstanden noch vier Mini-Tartes in den Silikon-Muffinsformen die ein leckerer Snack den nächsten Tag auf Arbeit abgaben.

Das Ergebnis:

Weihnachtsäpfel-Verwertung: Bratapfel-Käsekuchen & Apfel-Toffee-Tarte

Wo meine Eltern manche Sachen herkramen und warum sie sie kaufen ist mir manchmal ein Rätsel. Zu Weihnachten sollte ich eine kleine Kiste Äpfel für meinen Bruder mitnehmen, der wollte sie aber eigentlich gar nicht haben (jedenfalls nicht die komplette Kiste). Also blieben sie bei mir stehen, aber kein Problem, irgendwo hatte ich doch noch ein paar Rezepte ...


Bratapfel-Käsekuchen

  • 200 g Mehl

  • 100g Butter

  • 80 g + 125 g Zucker

  • Salz

  • ein Eigelb

  • 2 Eier und das restliche Eiweiß

  • 50g Marzipan-Rohmasse

  • 30g gehackte Mandeln

  • einen halben TL Zimt

  • 4 kleine säuerliche Apfel, entkernt und halbiert

  • 6 EL Zitronensaft

  • 500 g Magerquark

  • 1 Pck Vanille-Puddingpulver

  • 100 g Schmand


außerdem: eine rechteckige Silikon-Backform, 26x22 cm


Mehl, Butter, 80 g Zucker, eine Prise Salz und das Eigelb zu einem glatten Teig verkneten, in Folie wickeln und ein halbe Stunde im Kühlschrank ruhen lassen.


Das Marzipan mit den Mandeln und dem Zimt verkneten. Die Äpfel mit dem Zitronensaft einreiben, damit sie nicht braun werdern. Den Quark mit dem Restlichen Zucker, dem Schmand, Zitronensaft, den Eiern und dem Puddingpulver zu einer glatten Masse verrühren. Im Originalrezept wird doppelt so viel Füllung verwendet (also Zutaten verdoppeln), das war mir aber zu viel. Ich habe auch nur 100 g normalen Zucker und 25 g Vanillezucker verwendet.


Den Backofen auf 150°C (Umluft, E-Herd 175°C) vorheizen. Den Teig ausrollen und die Form damit auslegen - es wird ein kleiner Rest übrig bleiben (s.u.). Die Füllung hineingießen und die Äpfel darauflegen, die Marzipan-Mandel-Masse darüberbröseln. 50 Minuten backen, im Ofen ca. 10 Minuten ruhen und dann herausnehmen und vollständig auskühlen lassen.


Und was mit dem restlichen Teig und den Äpfeln machen? Laut Jamie Apfel-Toffee-Tarte ... doch Moment ... wie er das Toffee da zubereitet, das ist doch Dulche de leche,und davon habe ich doch noch zufälligerweise einen Rest im Kühlschrank! Also Teig in eine kleine Runde Form gepackt, die Apfelspalten mit Puderzucker vermischt, das Toffee ausgestrichen und die Spalten daruaf verteilt - bei 180°C für 35 Minuten in den Ofen - fertig!


Ich muß allerdings gestehen dass ich das Ergebnis schändlich mißbraucht habe - als Dessert der etwas besonderen Art. Weil ich noch griechischen Joghurt da hatte und keine Marmelade einrühren wollte kam einfach eine halbe Tarte hinein. Das war auch sehr lecker!

Vanille-Kardamom-Flan-Tarte

Beim Lesen meines Lieblings-Food-Blogs La Tartine Gourmande fand ich ein verlockendes Rezept für eine süße Tarte, die ich unbedingt ausprobieren mußte - allerdings war ich gezwungen die Einheiten ins europäische Maßsystem umzurechnen - den Rest könnt Ihr ja aus dem Originalrezept entnehmen, die Zutaten habe ich unten nochmal aufgeführt.
  • einen süßen Mürbeteig (ich habe darin einen Rest Mandeln verwendet, den ich noch da hatte)
  • 90 g Stärke
  • 900 ml Milch
  • 2 Eier und ein Eigelb
  • 1 Vanilleschote
  • 150 g Zucker (100/50)
  • 8 Kardamom-Kapseln, zerdrückt
Backzeit und -temperatur: 200°C 10 min, dann 180°C 30 min. Die Füllung die ich noch übrig hatte, hat nicht lange überlebt sondern ist recht rasch in meinem Mund gelandet ;)

Banoffee Pie

  • 1 Springform (20 cm Durchmesser)
  • 1 Dose Dulce de Leche
  • 150 g Kekse (Löffelbiskuits, Butterkekse o.a.)
  • 75 g gesalzene Butter, zerlassen
  • 3 Bananen , 1 EL Kakaopulver
  • 300 ml Rahm, 2 EL Mascarpone


Die Kekse in einer Schüssel zerbröseln, die flüssige Butter dazugeben und gut mischen. Die Masse in die Form drücken und im Kühl­schrank fest werden lassen. Bananen in Schei­ben schneiden und auf dem Boden vertei­len. Die Dulce de Leche auf die Bananen streichen. Rahm mit Mascarpone steif schlagen; auf die Creme geben. Den Pie 2-3 Stunden durchziehen lassen, mit Kakaopulver bestreuen, aus der Form nehmen und servieren.

Damit die Sahne schön steif bleibt habe ich einen gehäuften Eßlöffel Sofortgelatine beim Schlgen mit dazugegeben. Anstatt einer runden Form habe ich eine eckige genommen und die Seiten wie bei einer Charlotte mit halbierten Biskuitteilen ausgekleidet. Mein Problem war die Klebrigkeit der Dulce de Leche - die war so gut karamellisiert dass sie sich gar nicht mehr auf die Bananen streichen ließ sondern die Bananen mitsamt Teig nach oben zog und so unschöne Löcher hinerließ - selbst mit erwärmen und flüssig machen ließ sich das Problem nicht wie gewünscht beheben - aber der Geschmack war trotzdem unschlagbar ...

Süßkartoffel-Tarte mit geräuchertem Schinken

Und meine Tarte-Liebe setzt sich fort - wieder einmal in Kombination mit meiner geliebten Süßkartoffel und Räucherschinken ...

Teig:

  • 200 g Mehl
  • 1 Prise Salz
  • 100 g Fett (zB 50 g Butter und weißes Pflanzenfett)
  • 1 Eigelb
  • 2-3 EL kaltes Wasser

Die Zutaten zu einem glatten Teig verarbeiten und eine halbe Stunde im Kühlschrank ruhen lassen.

Belag:

  • 1 Süßkartoffel, in dünne Scheiben geschnitten
  • je 2 EL Senf und Tomatenmark
  • 8 Scheiben Räucherschinken
  • 1 Becher Schmand
  • 2 Eier
  • Salz und Pfeffer
  • 1 Büffelmozarella
  • 2 Handvoll geriebener Emmentaler

Das Tomatenmark mit dem Senf vermischen und auf dem Boden verteilen. Abwechselnd in Reihen mit den Kartoffeln und dem Speck belegen. Schmand mit den Eiern vermischen und mit Salz und Pfeffer würzen, darüber verteilen. Zum Schluß den Mozarella zerpflücken und zusammen mit dem Emmentaler auf dem Belag verteilen. Im vorgeheizten Backofen bei 190°C 40-45 Minuten backen.

Tarte mit Kirschtomaten und Parmaschinken

Eigentlich ein Sommerrezept aus der "LECKER", aber ich fand es auch im Herbst/Winter ansprechend. Allerdings hatte ich überhaupt keine Lust auf Mürbeteig herstellen... Also fix einen fertigen Blätterteig gekauft ...

  • 1 fertigen Blätterteig (Rolle)
  • 500 g Kirschtomaten
  • 200 g Schmand
  • 2 Eier
  • 50 g Parmaschinken
  • getrockneter Basilikum (oder Oregano nach Belieben)
  • Salz & Pfeffer
  • 25 g frisch geriebener Parmesan

Den Blätterteig auf das Backblech legen, einen ca 1 cm breiten Rand einschneiden (aufpassen, den Teig nicht durchschneiden, sonst funktioniert es nicht). Den Schmand mit den Eiern und dem Parmesan verrühren und mit Salz und Pfeffer würzen. Auf dem Teig verteilen. Die halbierten Kirschtomaten und den Schinken gleichmäßig verteilen. Das Basilikum oder den Oregano darüber streuen. Im vorgeheizten Backofen bei 175°C (Umluft) 25-30 Minuten backen.

Da ich keinen Parmesan da hatte (wie konnte mir das bloß passieren?!) hab ich ihn weggelassen und stattdessen 1/2 "Feta" aus Schafs- und Kuhmilch in Würfeln und geriebenen Emmentaler über dem Belag verteilt. Das war mindestens genauso gut.


Tarte mit gegrilltem Gemüse

Die meisten meiner Rezepet sind eine Art von Restverwertung - wenn nich nicht gerade vorher genau geplant hatte ein Bestimmtes zu kochen. Dieses hier ist das Ergebnis aus einer furchtbaren Zucchini-Schwemme, meiner Liebe zu Tartes und dem schlechten Gewissen dass mal wieder etwas vegetarisches verlangte.


Nachdem ich stundenlang Zucchinistreifen in meiner gußeisernen Grillpfanne gegrillt hatte und einen Teil davon eingelegt, war trotzdem noch ein Rest übrig. Dazu möchte ich bemerken dass ich diese vermaledeite Pfanne NIE wieder auf dem Herd benutzen werde - erstens zerkratzt sie alles, zweitens wird sie aufgrund der Größe nicht überall gleichmäßig warm und drittens bäckt trotz nach Anleitung durchgeführter "Imprägnierung" alles an. Die in Öl eingelegten Zucchinis sind übrigens nach ein paar Wochen in den Mülleimer gewandert weil sie angefangen hatten zu gären. Das nächste Jahr wecke ich mit den entsprechenden Gläsern im Ofen ein ...


Ich hatte ein paar Möhren mitgegrillt (in weiser Voraussicht). Die Herstellung des Tarteteiges erfolgte nach Anleitung aus meinem Tartebuch und zusätzlich kamen noch ein paar Mohnsamen dazu - soll das ganze knuspriger und nussiger im Geschmack machen. Anschließend wurde der Boden mit den Zucchinis und Möhren belegt. Dazwischen legte ich ein paar halbierte Kirschtomaten. Zum Abschluß wurde gesalzen und gepfeffert, mit gerocknetem Rosmarin und Thymian bestreut und noch geriebener Käse (Emmentaler) darüber gegeben und bei 180°C 40 Minuten im Ofen gebacken. Das Ergebnis war durchaus ein Erlebnis für den Gaumen, aber nur schlecht eßbar (das Gemüse ruschte vom Teig und wir waren gezwungen alles einzeln zu essen).
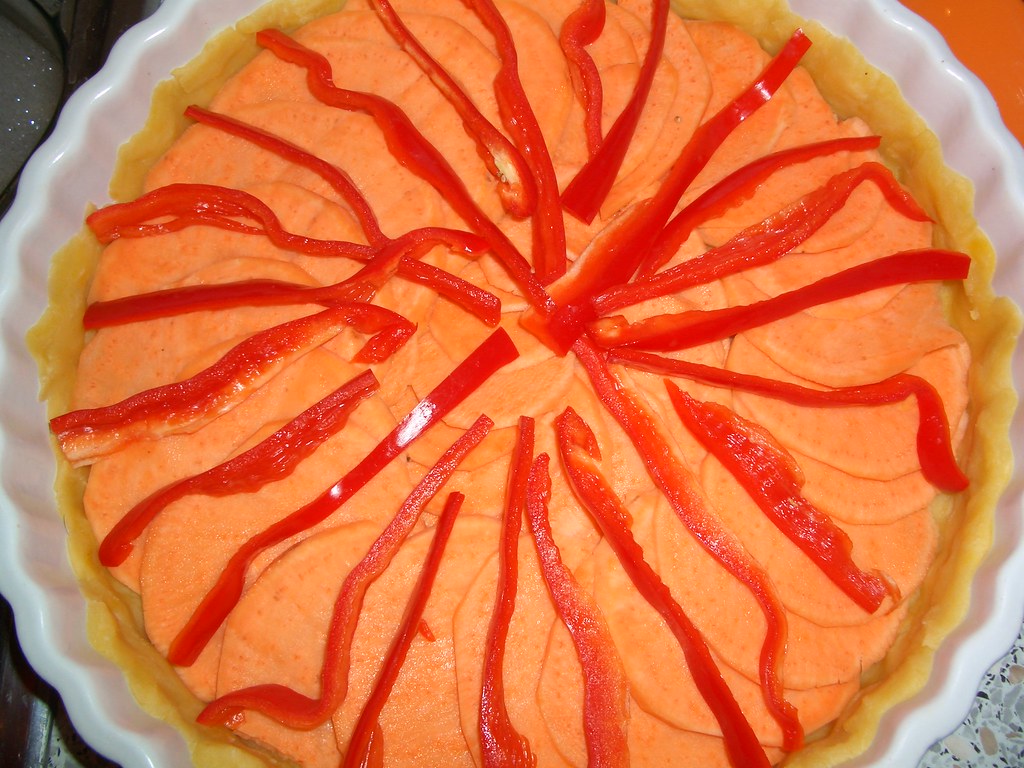

Tarte mit Süßkartoffeln, Paprika, Schinkenspeck und Ricotta

Das ist meine kleine herzhafte Versuchstarte die ich im Januar mal bei Robert ausprobiert habe - Eine Süßkartoffel war übrig (aus der anderen habe ich eine leckere Suppe gezaubert), Paprika war da, und diese kleinen Schinkenspeckwürfel habe ich eigentlich immer da.

Was ich das nächste Mal anders machen würde: Die Süßkartoffeln ein bißchen "einfetten" damit sie knuspriger wird, und erst allein mit dem Teig so ca 10 min "vorbacken" - dann sollte der Teig nicht so naß und die Kartoffeln etwas weicher werden. Vom Geschmack her würden gegrillte Paprika der Sachen noch einen kleinen Kick geben, wem das frische Herstellen zu aufwendig ist kann auch die aus dem Glas nehmen. Außerdem würde ich anstatt Rosmarin Thymian zum Würzen verwenden, da der Rosmaringeschmack doch zu intensiv ist.

Anschließend das modifizierte Rezept (Mengenangaben beim Belag pi mal Daumen da ich beim Versuchskochen immer nach Augenmaß arbeite):

Für den Teig 200 g Mehl, 1 Prise Salz und 100 g Butter (kalt, gewürfelt) vermengen bis die Mischung bröselig wird, dann 1 Eigelb einarbeiten bis die Mischung beginnt zu verklumpen - noch 2-3 EL eiskaltes Wasser dazufügen um den Teig zu einer festen Masse zu binden. Zu einer Kugel kneten und 30 min im Kühlschrank kühlen.

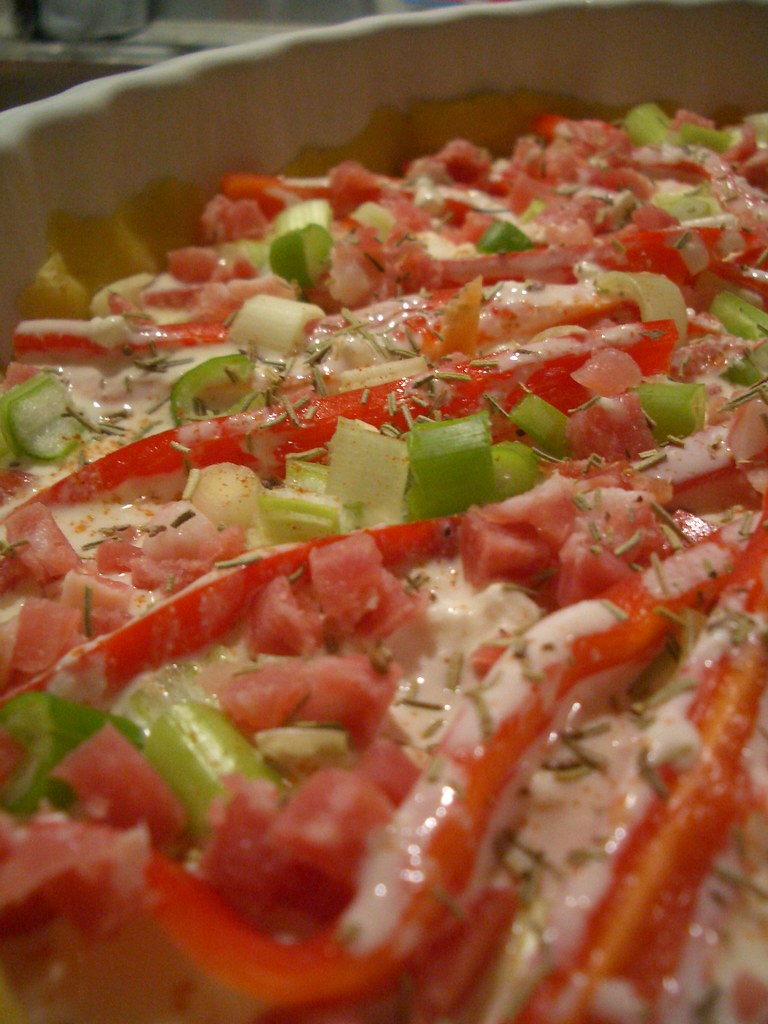
Eine große Süßkartoffel in dünne Scheiben hobeln und diese mit etwas flüssiger Butter (und wenn erwünscht etwas Chilipulver marinieren. Die gegrillte Paprika (2 Stck) und 2 Lauchzwiebeln in dünne Streifen schneiden. 125 g Schinkenspeck würfeln (oder gewürfelt kaufen). Für die Soße 200 ml Sahne, 125 g Ricotta und ein Ei mischen, mit Salz und Pfeffer würzen.

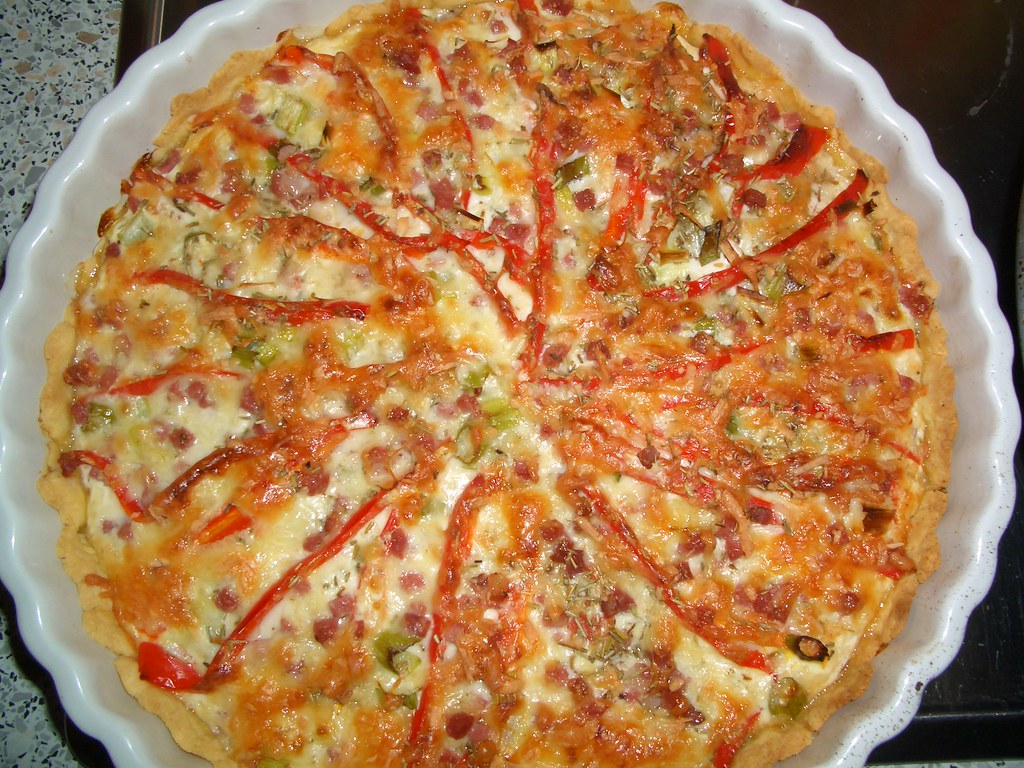
Den Teig ausrollen und in die Form einpassen, mit den gebutterten Süßkartoffelscheiben belegen und im vorgeheizten Ofen bei 200°C 10 min vorbacken. Dann Paprika, Schinkenspeckwürfel, Lauchziebeln und Soße darauf verteilen, nochmal mit einer Handvoll Thymian, Pfeffer und Salz würzen und nochmal für 20 min in den Ofen schieben.

Der Boden mit schon drapierten Süßkartoffelscheiben und Paprikastreifen.
Die Tarte fertig belegt und mit Soße übergossen.
Frisch aus dem Ofen.

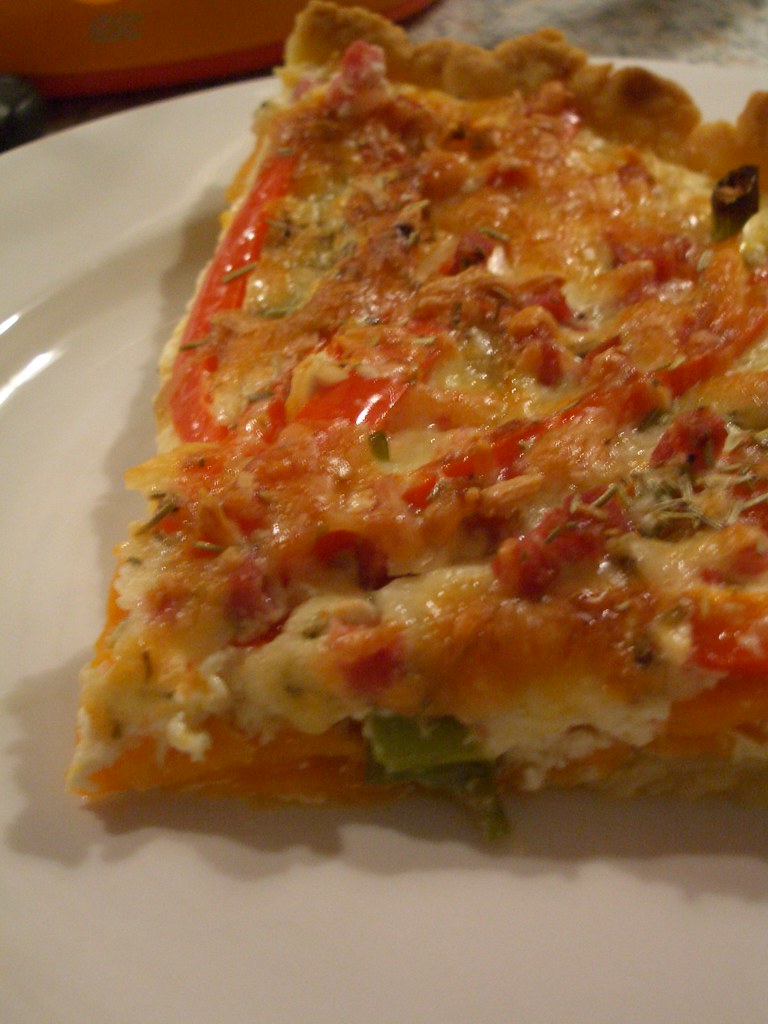
Heiß auf den Teller ... und ab in den Mund ;)

Quiche mit roter Beete, Zwiebeln und Camembert

Das ist ein Rezept welches ich zuerst in Trondheim zuammen mit Nina ausprobiert habe. Wir waren beide vom Ergebnis überrascht - eine sensationelle Kombination! Am besten schmeckt es natürlich mit frischen Zutaten; und die lange Zubereitungszeit lohnt sich wirklich.

  • 375 g Blätterteig, aufgetaut (am besten fertiger)
  • 25 gesalzene Butter
  • 2 EL Honig
  • 3 rote Zwiebeln, in dünne Scheiben geschnitten
  • 300 ml Rotwein (zur Not geht auch mit Wasser verdünnter Rotweinessig)
  • 500 g rote Beete, gegart und in Scheiben geschnitten
  • 3 EL Thymian, gehackt
  • 150 g Camembert, in Scheiben geschnitten
  • Salz, Pfeffer

Butter und Honig in einer Pfanne erhitzen und die Zwiebeln darin weich dünsten; mit dem Wein ablöschen und Salz und Pfeffer abschmecken. Köcheln lassen bis die Flüssigkeit zur Hälfte reduziert ist. Die rote Beete zugeben und weiter köcheln bis die Sauce dick ist; die Hälfte des Thymian zugeben und das Ganze abkühlen lassen. Den Teig auf auf einem Backblech auslegen. Mit einem Messer ca 2,5 cm vom Rand entfernt eine Linie einkerben, aber den Teig nicht komplett durchschneiden. Dann den Belag auf den Teig geben (innerhalb der eingekerbten Linie bleiben). Den restlichen Thymian und den Käse darüber verteilen und bei 200°C 20-25 min backen bis der Teig am Rand schön aufgegangen ist und der Käse Blasen wirft.

(aus Sarah Ford: Tartes und Quiches)

Sarah Ford:Tartes und Quiches. Süße und herzhafte Rezepte