Posts mit dem Label Dessert werden angezeigt. Alle Posts anzeigen

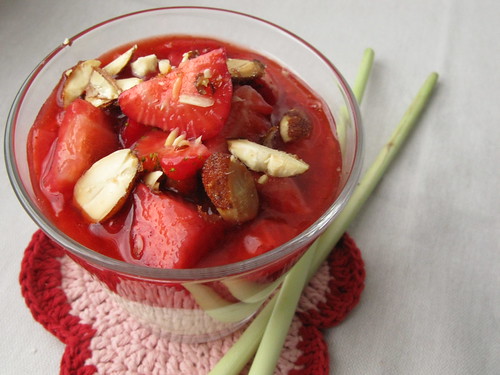
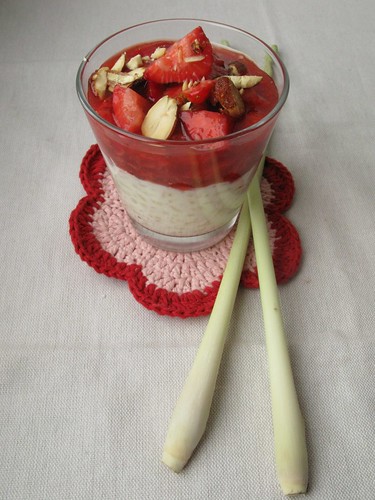
Fridays with Beatrice: Rice Pudding with Strawberries stewed in Lemongrass and Lime

This time, you are lucky. Lena chose her favourite recipe of the book and is sharing the recipe too. It's something sweet with fruits of the season - strawberries. They are cooked with lime and lemongrass and used as a topping for rice pudding (something I would translate to German as 'Milchreis' in this case). The rice pudding is flavoured with ginger and lemongrass, an idea I really like. Usually we serve rice pudding plain with cinnamon and sugar, which can be boring. 


 I have used the combination of lime and strawberries before - really good for jam or a cake . I was excited how some additional lemongrass would work. When cooking I had to think about a friend of mine who - after beeing pregnant - coulnd't stand ginger or lemongrass anymore. What a pity!
Making the rice pudding and the strawberry 'compote' was easy. I minced the lemongrass in my mortar and added some organic carob gum to the compote for a thicker consistency.
Beatrice says the dish is best when eaten lukewarm, but I had it at work cold from the fridge and it was delicious -especially with this hot and humid weather at the moment. The lime and lemongrass are enhancing the fresh flavour and I can imagine using it as a base for an ice cream.


Roundup:  Flavour explosion in your mouth. Perfect summer dish. Can be eaten as dessert or dinner.

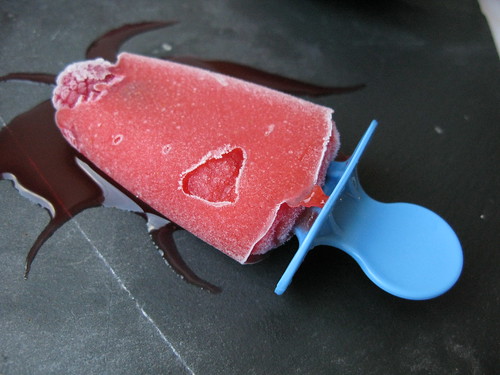
Mango-Erdbeer Sorbet am Stiel [Mango-Strawberry Sorbet Ice Pops]

Da hier hochsommerliche Temperaturen herrschen (ok, heute nun mal gerade nicht), gibt es etwas Erfrischendes für alle Eisliebhaber. Die Idee warein Sorbet aus Mangos und Erdbeeren herzustellen. Normalerweise mache ich einen Shake oder einen Fruchtsalat aus frischen Früchten, aber das war mir bei dieser Wetterlage nicht kalt genug. Anstatt das Fruchtpüree gleich in die Eisförmchen zu füllen, habe ich meinen (schon vor ewigen Zeiten hergestellten) Invertzuckersirup hervorgekramt, um dem Ganzen eine weiche Konsistenz zu verleihen und zum Titel Sorbet zu verhelfen. Normalerweise wird für ein Sorbet erst ein Zuckersirup gekocht, aber wer möchte schon bei 30°C den Herd anstellen?! Den Zuckersirup empfehle ich also besser im Winter herzustellen, da er sich lange hält. Der Aufwand ist etwas größer, aber im Prinzip macht die Industrie genau dasselbe mit den fertigen Eispulver-Mischungen (einfach mal auf die Zutatenliste schauen). Für das Sorbet selbst braucht man nicht einmal eine  Eismaschine. Das Ganze kann auch in eine große Auflaufform gefüllt, aller 2-3 Stunden aus dem Gefrierfach geholt und mit einer Gabel 'aufgelockert' werden, prinzipiell kann man das Sorbet aber auch gleich in die Stieleisformen füllen. 

[for English version, scroll down]


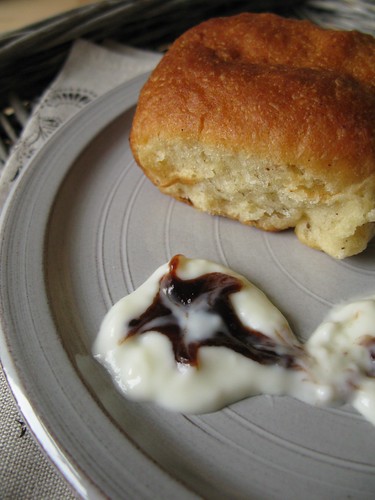
Buchteln (alias Dampfnudeln) mit Pflaumenmusfüllung

Die Tage werden kürzer, das Wetter stürmischer und kälter, also genau richtig, um drinnen zu bleiben, die dicken Socken hervorzukramen und sich mit warmen Speisen zu verwöhnen. Das folgende Gericht ist einfach perfekt dazu - zwar habe ich es im heißesten Sommer gekocht und fotografiert (bei 28°C mache auch nur ich den Herd an ...), aber beim Anblick läuft mir schon wieder das Wasser im Mund zusammen. Hier in der Region sind Buchteln zwar als Dampfnudeln bekannt - zumindest wies es so immer der Essensplan der Schulspeisung aus - aber es ist die selbe Bezeichnung für eine ursprünglich aus dem Böhmischen stammende Mehlspeise. Mein Rezept ist aus einer Ausgabe der A la Carte "Das süße Wien" - einem Magazin welches ich bei meinem Besuch in Wien unbedingt kaufen musste. Wer sonst, wenn nicht die Wiener, verstehen sich auf solchen Süßkram am besten ... Ich habe noch eine Pflaumenmusfüllung 'ergänzt', aber es geht sicherlich auch jede andere Marmelade, wer möchte kann sie aber auch ganz 'pur' herstellen. Mit dem gemeinen Germknödel, der hier zu Lande in den Supermärkten feilgeboten wird, hat die Buchtel aber nichts zu tun, den der reichhaltige buttrige Teiggeschmack lässt sich gar nicht mit den geschmacklosen Luftschwämmen vergleichen ...


Birnen-Minze-Sorbet

Heute ist eine Ausnahme - es ist nicht so drückend heiß wie die letzten Tage. Ok, es ist Sommer und da ist es naturgemäß heiß, aber ich mag es lieber kalt. ehrlich gesagt ich hasse die Hitze und könnte mir etwas besseres vorstellen als mich stundenlang selbst in der Sonne zu grillen. Bei solchem Wetter bleibe ich zu Hause und ... mache Eis - oder genauer gesagt - Sorbet. Einige Rezepte habe ich schon ausprobiert, unter anderem ein Rotwein-Himbeer-Sorbet von David Lebovitz (dem Eiscreme-Papst) oder ein umwerfendes Zitronensorbet von Jamie Oliver, das man auch hervoragend in den ausgehöhlten Zitronenschalen servieren kann. Ein anderes Rezept von ihm wollte ich auch noch ausprobieren, nämlich das Birnensorbet (welches aus dem selben Buch wie das Zitronensorbet -"Genial italienisch"-  stammt). Das Originalrezept (englisch) erschien mir aber ein bißchen fad, und ich erinnerte mich an meine Zeit in Polen, wo ich in der Sommerhitze immer Birnen-Minze-Eistee getrunken habe, nur den gibt es hier in Deutschland nicht. Warum also diesen Geschmack selbst herstellen? Ich hatte kurz vorher Nanaminze im Teeladen gekauft, und die schien mir genau richtig dafür.


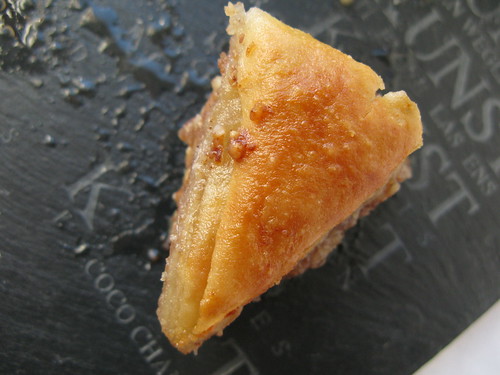
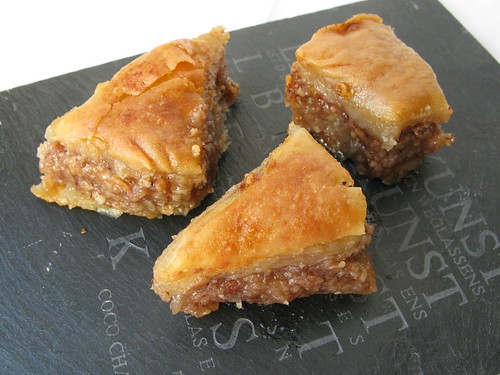
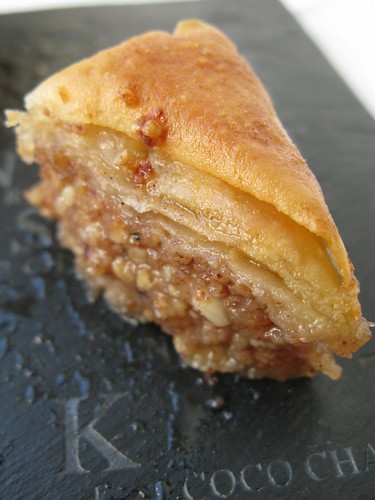
Daring Bakers June Challenge: Baklava and Homemade Phyllo dough

Erica of Erica’s Edibles was our host for the Daring Baker’s June challenge. Erica challenged us to be truly DARING by making homemade phyllo dough and then to use that homemade dough to make Baklava.

I paniced a little bit when reading the challenge. This kind of recipe requires a lot of time and patience; things, I don't have lot's of (especially patience). Finally I made it - as always - and daring enough for me I guess. I was suprised as with every challenge that the result was tastier and prettier than I could have imagined. I hardly could stop my boyfriend trying before I took pictures ("No, I didn't take pictures yet. Back off!") This recipe is something to be definitively made again (but only with store-bought dough) ;) !


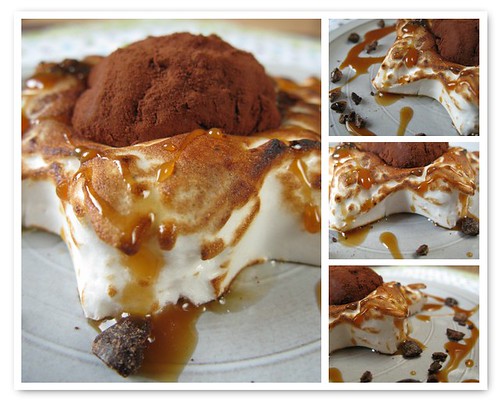
Daring Bakers May Challenge: Chocolate Marquise on Meringue

The May 2011 Daring Bakers’ challenge was hosted by Emma of CookCraftGrow and Jenny of Purple House Dirt. They chose to challenge everyone to make a Chocolate Marquise. The inspiration for this recipe comes from a dessert they prepared at a restaurant in Seattle.

"When we learned we’d be hosting a Daring Bakers challenge, we knew this was the dessert to share with all the other bakers willing to take it on. Why is this dessert so special? Well, for starters, it’s rare for us to meet anyone who’s even heard of a marquise, much less tasted one. Nobody makes this dessert anymore. I found a recipe for it in a professional pastry curriculum, but I’ve almost never seen it in mainstream cookbooks, and rarely is it written about online (although there seem to be plenty of photographs). We’d better share it if we want to keep it alive.
It’s also a fairly involved dessert, if you make all of the components. Imagine a cube of spicy and creamy chocolate resting on a tuft of something that tastes like burnt marshmallow cream, drizzled with tequila caramel, spicy nuts, and some cacao nibs. Yum. But take away all of those accoutrements, and you have a lot of technique in these recipes, things you may not get to do every day. When was the last time you worked with a frozen mousse? Boiled meringue? A blowtorch?"

Yes, they were right. I have never heard of or seen a recipe for a marquise.It tasted intersting but I had a hard time making it. First, I learned again that it is important to read correctly because there IS a difference between egg yolks and egg whites - which was the reason I had do toss the first attempt away. Second, I still did something wrong. My marquise didn't get solid enough for cutting or any kind of shaping. That's the reason for this lump in the middle of the meringue. Third, the method for making the meringue was quite different but idiot proof. My meringue got creamy, stiff but still fluffy without any problems. If everyone was experiencing the problems I had while making, I do not wonder why nobody makes it anymore ...

Daring Bakers April Challenge: Maple Mousse and (sweet) edible containers

The April 2011 Daring Bakers’ challenge was hosted by Evelyne of the blog Cheap Ethnic Eatz. Evelyne chose to challenge everyone to make a maple mousse in an edible container. Prizes are being awarded to the most creative edible container and filling, so vote on your favorite from April 27th to May 27th at http://thedaringkitchen.com!

After being choosen as a finalist for the savoury was the bar set very high for the Daring Bakers Challenge too. But to my despair all my ideas for sweet edible containers were posted into the forum thread before I could realize them - so I had to say goodbye to chocolate and caramel bowls, and I don't wanted to make an ice or sorbet bowl again. 
There were lots of other creative ideas I never would have thought of, so I would like to share my (five) favourites before showing with what I came up finally.

The Flirty Blog - Pancake Vol-au-vents
Audax Artifex - Sour glazed maple syrup petit fours (he did 9! different versions and I love each one of them)
Anasbageri - Maple red flowers (raspberry tuiles)
Catalina bakes - Cookie egg shells
TxFarmer - Coffee jello (in a flower shape)

My idea was making candy bars because I have bookmarked lots of candy bar recipes recently, including making Twix bars and other sweet treats. I remembered some candy bars I liked to eat when staying in Norway. They are called 'Smash!' and consist of salted corn cores covered with chocolate. I liked the idea of creating a similar bar and used cornflakes with a version of my favourite salted caramel sauce as the base - call it a salty cornflake fudge. This was topped with the maple mousse and covered with chocolate. The remaining mousse was piped into some ice cube moulds from IKEA and covered  just with chocolate (what made really nice pralines). Thanks to my dear friend André I could use my new praline set  with a special rack and forks for that (this was a great birthday present indeed).


My brother- and sister-in-law were my guinea pigs this time and they loved those sweet treats. They dind't taste like 'Smash!' but this melting symphony of sweet & salty in your mouth was irresistable. The only downside was the calorie content ...
I had rarely used maple sirup before - the only recipes I did were in combination with walnuts like those muffins (should make them again soon) or donuts. The mousse was fabulous and really easy to make, so I think about making a swiss roll with walnut sponge cake and maple mousse filling. Maybe a maple ice cream with roasted walnuts wouldn't be bad either ;)

Maple Mousse Candy Bars

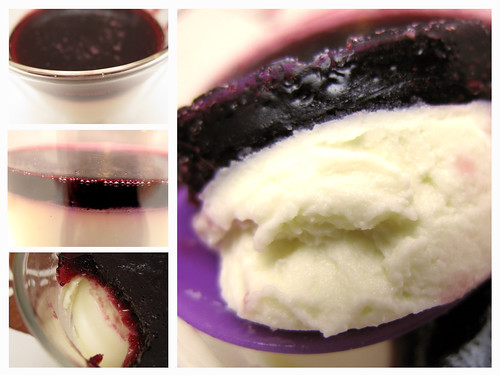
Daring Bakers Challenge: Panna cotta with Elderberry Gelée & Florentine Cookies

The February 2011 Daring Bakers’ challenge was hosted by Mallory from A Sofa in the Kitchen. She chose to challenge everyone to make Panna Cotta from a Giada De Laurentiis recipe and Nestle Florentine Cookies.

I love panna cotta. Every time we eat at Vapiano, I have to have one of theirs for dessert. I made some variations myself, even as cake (a recipe from Aran of Cannelle et Vanille, published at Design Sponge). So I was glad to have the opportunity to make one again, eager to add a tonka bean (which I hat only used once before) as flavouring agent. But what to choose as topping? A time ago I had bought elderberry juice which was originally thought to top an apple mousse (as gelee). I didn't make the mousse, but wasn't elderberry gelee a delicious topping for panna cotta to? I bet!


Daring Bakers January Challenge: Biscuit Joconde Imprime/Entrement

The January 2011 Daring Bakers’ challenge was hosted by Astheroshe of the blog accro. She chose to challenge everyone to make a Biscuit Joconde Imprime to wrap around an Entremets dessert.
"A joconde imprime (French Baking term) is a decorative design baked into a light sponge cake providing an elegant finish to desserts/torts/entremets/ formed in ring molds. A joconde batter is used because it bakes into a moist, flexible cake. The cake batter may be tinted or marbleized for a further decorative effect. This Joconde/spongecake requires attentive baking so that it remains flexible to easily conform to the molds. If under baked it will stick to the baking mat. It over baked it will dry out and crack. Once cooled, the sponge may be cut into strips to line any shape ring mold.
Entremets (French baking term)- an ornate dessert with many different layers of cake and pastry creams in a mold, usually served cold. Think Trifle in a mold vs. a glass bowl."

This challenge was tough but came out nicely.  The first thing challenging was to find a mould which fit into my freezer. Luckily there is this new baking shop in Dresden, where I found the mould and the recommended silpat mat and pastry combs - I don't know how I would have survived this challenge without them ...
And as nothing is as tempting and delicious as a combination of chocolate and coffee, I choose a quick mousse au chocolat and coffee mousse as my fillings - which was really clever because I could use all my leftover egg yolks.


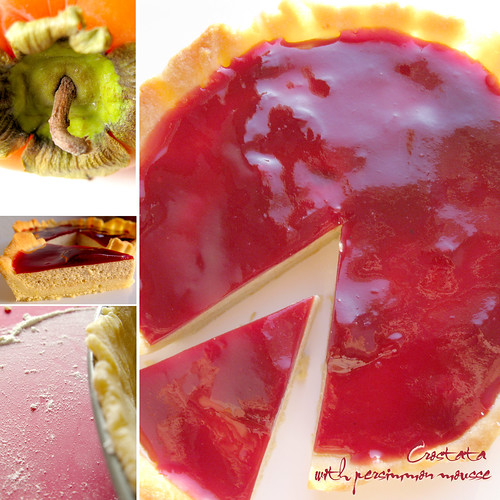
Daring Bakers November challenge: Crostata filled with persimmon mousse and raspberry jam

The 2010 November Daring Bakers' challenge was hosted by Simona of briciole. She chose to challenge Daring Bakers' to make pasta frolla for a crostata. She used her own experience as a source, as well as information from Pellegrino Artusi's Science in the Kitchen and the Art of Eating Well.

Crostata (tart) is an Italian dessert. The base of a crostata is pasta frolla(or pastafrolla), sweet short crust pastry (or sweet tart dough) made of flour, sugar, butter and eggs. Pasta frollais versatile: it provides the base to make crostata with fruit preserves, pastry cream, fresh fruit,ricotta, and other ingredients, and, by itself, it makes very nice cookies.

Tarte should be a piece of cake for me, made them a dozen times, you can find them all here. I wasn't so fond of the idea of a whole sweet jam filling*, so I rather preferred blind baking and adding a filling afterwards. There are masses of possibilities for filling, I once for example made an apple cinnamon ice cream filling and topped it with marzipan. But I was looking for something new. I remembered a dessert recipe from one of my friends I liked very much. It's an apple mousse which is topped with a chocolate mousse or elderberry sauce. Apple seemed a little bit to plain so wanted something more fancy. Because I never used persimmons before I decided to gor for a persimmon-raspberry combination. The result was really smooth and tasty but took a lot of time (which involved a lot of waiting but was worth it).

* In Austria such a tarte with jam filling and dough stripes on top for decoration is called 'Linzer Torte'.

Crostata filled with persimmon mousse and raspberry jam


Daring Bakers August Challenge: Ice Cream Petit Fours with Brown Butter Pound Cake

The August 2010 Daring Bakers' challenge was hosted by Elissa of 17 and Baking. For the first time, The Daring Bakers partnered with Sugar High Fridays for a co-event and Elissa was the gracious hostess of both. Using the theme of beurre noisette, or browned butter, Elissa chose to challenge Daring Bakers to make a pound cake to be used in either a Baked Alasa or in Ice Cream Petit Fours. The sources for Elissa's challenge were Gourmet magazine and David Lebovitz's "The Perfect Scoop".

My ice cream machine-buy was no bad idea wasn't it? In this month's challenge I could use it again. The original recipe for the ice cream was vanilla flavour but I decided for cheesecake after tasting some crumbs of this delicious butter pound cake. Unfortunately my boyfriend didn't share my opinion - he doesn't like cheesecake at all and disliked the flavour combination at the first taste. I thought otherwise - I fell in love with it - cannot understand that there are really people who do NOT like cheesecake, the best cake ever ... I decided to go with white chocolate with some coconut shreds in it. The taste was all right, but of course the cake was shining through (should have thought about that before), the petit fours were great anyway (I'm going to post pictures of the ready ones later because I have to head to my mother-in-law...).

Ice Cream Petit Fours (*Butterfinger* style)


Sweet (Ice Cream)Dreams

Durch meine kleine Foodblog-Besessenheit war ich irgendwann auf das Blog von David Lebovitz gestossen, besser gesagt zuerst auf das Rezept seiner Salted Butter Caramel Ice Cream - ein Traum in Eis für Karamellliebhaber wie mich. Also war der Plan, irgendwann eine Eismaschine anzuschaffen - wohin dann in unserer kleinen Küche damit, war mir aber unklar, also blieb die Planung an diesem Punkt stehen. Bis letzten Monat, als ich (wieder einmal genötigt durch meine monatlich Daring Bakers Challenge) plötzlich eine Eiscreme-Torte herstellen musste. Ok, da war die Sache natürlich 'gegessen', die Maschine musste her. Ich wollte gerne eine mit Kompressor, denn auf 24h lang Kühlbehälter im Gefrierschrank langern hatte ich keine Lust, noch dazu wo ich nie Platz habe ;) Nach kurzer Suche fanden wir auch eine passende Eismaschine von Unold, die es gerade bei amazon im Angebot gab. Das passende Buch dazu war auch schnell gefunden und gleich mitgeordert - 'The perfect scoop' - natürlich von oben genanntem Eiscreme-Gott.

Noch an dem Tag wo unsere neue Erungenschaft eintraf, wurde mit der Produktion begonnen - zwei Rezepte (und die entscheidenede Challenge mit der Eiscreme-Torte) gibt es hier. Das einzige Problem sind die Unmengen an Eigelb die man für die Eisherstellung braucht. Da ich aber bald Unmengen an Meringue-Buttercreme herstellen werde, geht es am Ende dann doch wieder auf. Dazu später mehr.

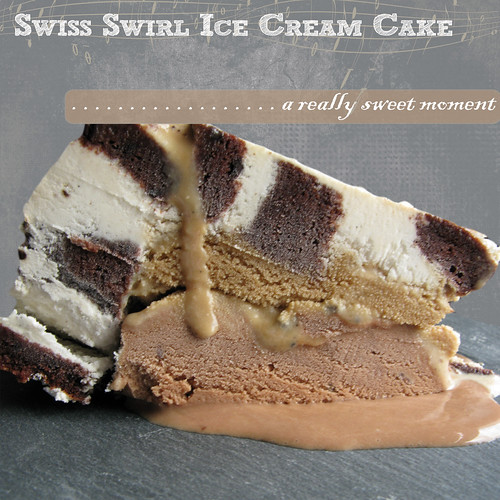
Daring Bakers July Challenge: Swiss Swirl Ice Cream Cake

The July 2010 Daring Bakers' challenge was hosted by Sunita of Sunita's world - life and food. Sunita challenged everyone to make an ice-cream filled Swiss roll that's then used to make a bombe with hot fudge. Her recipe is based on an ice cream cake recipe from Taste of Home.

Well ... I am feeling a little bit sick today. After licking a dozen spoons (can't help myself) covered with sugar and cream-containing mixtures I am not excited any more about the ice cream cake forming into my freezer. If you ask me now, no more ice cream for me ... Just a few days earlier, I was jumping for joy because my ordered ice machine had arrived. Yes, I ordered an ice machine - not only for the challenge, I had been playing with this thougt for a while, and this month's challenge was the last straw (like the crepe pan - thanks again ;). Of course I had to have the suitable book too - I guess if you have been (food)blogging and reading for a while, you know David Lebovitz. I read this name for the first time as someone mentioned making one of his ice cream recipes, particularly this salted butter caramel ice cream. Not to mention this site has been among my favourites ever since. Of course I ordered The perfect scoop too. I gained two pounds just from looking at the recipes in this book, but nevermind. Luckily I prepared two different ice creams bearing the challenge in mind. Not the caramel one which should be eaten just pure ... I chose a salty caramel sauce instead of the hot fudge. It turned out to be very fluid so maybe I'll keep with the original recipe next time.

Yesterday I recognised it was already the 26th and I had to finish and post the challenge today. The cake is still freezing and not ready to serve - and I couldn't eat a piece to be honest. I am going to taste and make pictures during my next craving for chocolate and sweet stuff, I promise. (Note from the 28th of July: My never-tired-of-sweet-stuff boyfriend completed the task for me, he managed to eat a whole piece of this calorie bomb. During cutting, serving and photographing the cake I had some serious tilting- and melting-promblems but I got at least one good shot displayed beneath.)


Chai coffee Pot the Crème

Have you ever head of pot the creme? Not me before I stumbled upon it on one of my favourite foodblogs La Tartine Gourmande. If you ask all-knowing Wikipedia about this French dessert it just answers you: "Pot de crème is made with eggs, cream, milk, and a flavor, often vanilla. The mixture is then poured into ramekins which are then baked in a water bath." Basically it is the (more sophisticated) French version of our German Pudding (custard), which isn't made with eggs but with corn starch. Nobody in Germany I know makes Pudding from scratch (except me and my dear friend André of course who likes to use all chocolate rests he doesn't likes to eat ). Normally you just buy a package, cook milk, stir in powder and sugar - ready. So I wanted to try the French version which is very handy if you (like me) alway have eggs and milk in your fridge. The time I tried this recipe, I was in love with a instant chai coffee I found at my supermarket (right, I confess I too used instant stuff in some way) - and I love coffee flavour ...

Chai coffee Pot the Crème
for 6 small glas jars
  • 1 egg and 1 egg yolk
  • 1 tablespoon sugar
  • 250 ml milk
  • 1 teaspoon instant espresso powder
  • one package instant chai coffee (Krüger)
In a pot, pour the milk bring to a boil. Mix in the espresso and chai coffee powder. Preheat your oven at 160°C. In a bowl, beat the eggs and egg yolk with the sugar, then add the hot milk slowly while beating. Pour the cream in small ramekins or jars and place them in a dish (or large baking mould) filled with hot water, so that they are half immersed. Place in the oven and cook for about 35 to 40 minutes. The middle of the creams should still be moving a little - the creams will settle once they cool down. Take the jars or ramekins out and let them cool down. Place a plastic wrap on top and place them in the fridge to rest for a few hours before eating.


There are lot's of variations you can make according to the flavours and I've picked out some interesting recipes from my favourite food blogs:
Potsdecremes.com (dessert history and recipes - even some savoury ones)
Maple Pot the Crème from O Pistachio
Chocolate and Vanilla Petits Pots de Crème from La Tartine Gourmande
Chocolate and Raspberry Pot de Crème, Lemon Thyme Pot the Crème and Butterscotch Pot the Crème from Canelle et Vanille

Daring Bakers March Challenge: Orange Tian

The 2010 March Daring Baker's challenge was hosted by Jennifer of Chocolate Shavings. She chose Orange Tian as the challenge for this month, a dessert based on a recipe from Alain Ducasse's Cooking School in Paris.

There are quite a few steps to making this dessert; however a lot of them can be made in advance. The tian consists of a pate sablee (the bottom), orange marmalade, whipped cream, orange slices and caramel. It has to be build upside-down, starting with the orange slices, then the cream and the pate with the marmelade at last. You'll therefor need cookie cutters . Ideally, you should have about 6 cookie cutters to build the desserts in and cut the circles of dough. The cookie cutters will be the size of your final dessert, so they should be the size of an individually-sized tart mold. If you don't have round cookie cutters you could use an individually-sized cheesecake mold without its base. I used some of my dessert rings, a small bundt cake mould and (just for fun) a dinosaur cookie cutter (which was a christmas present of a good friend).

What you can do in advance: The orange marmalade can be made several days ahead of time and the caramel sauce and orange segments preparation should be made the day before you make the dessert. As usual I wasn't as thoughtful as I'm writing here and made everything of the mentioned above two days ago (cause I had duty yesterday). I needed more preparing the tiramisu, but this time I struggeled more. One of the things I hate most is making orange slices - juice everywhere, burning hands and oranges some fall apart ... The result was quite good although I don't like that much cream in my desserts. I used the rests for another cake (taking it to the job tomorrow) and can't wait to try this one too ...


Orange Tian

for the Pate Sablee:
  • 2 medium-sized egg yolks at room temperature
  • 80 grams granulated sugar
  • ½ teaspoon vanilla extract
  • 100 grams unsalted butter, ice cold, cubed
  • 2 grams salt
  • 200 grams all-purpose flour
  • 4 grams baking powder
Put the flour, baking powder, ice cold cubed butter and salt in a food processor fitted with a steel blade (works also fine with your fingers if you don't have a food processor). In a separate bowl, add the eggs yolks, vanilla extract and sugar and beat with a whisk until the mixture is pale. Pour the egg mixture in the food processor. Process until the dough just comes together. If you find that the dough is still a little too crumbly to come together, add a couple drops of water and process again to form a homogenous ball of dough. Form into a disc, cover with plastic wrap and leave to rest in the fridge for 30 minutes. Preheat your oven to 180 °C.
Roll out the dough onto a lightly floured surface until you obtain a ¼ inch thick circle. Using your cookie cutter, cut out circles of dough and place on a parchment (or silicone) lined baking sheet. Bake for 20 minutes or until the circles of dough are just golden.

for the marmalade:
  • 100 grams freshly pressed orange juice 1 large orange used to make orange slices
  • cold water to cook the orange slices
  • 5 grams pectin
  • granulated sugar: use the same weight as the weight of orange slices once they are cooked
Finely slice the orange. Place the orange slices in a medium-sized pot filled with cold water. Simmer for about 10 minutes, discard the water, re-fill with cold water and blanch the oranges for another 10 minutes. Blanch the orange slices 3 times. This process removes the bitterness from the orange peel, so it is essential to use a new batch of cold water every time when you blanch the slices.Once blanched 3 times, drain the slices and let them cool. Once they are cool enough to handle, finely mince them (using a knife or a food processor). Weigh the slices and use the same amount of granulated sugar . If you don't have a scale, you can place the slices in a cup measurer and use the same amount of sugar. In a pot over medium heat, add the minced orange slices, the sugar you just weighed, the orange juice and the pectin. Cook until the mixture reaches a jam consistency (10-15 minutes). Transfer to a bowl, cover with plastic wrap and put in the fridge.

for the orange segments:

For this step you will need 8 oranges. Cut the oranges into segments over a shallow bowl and make sure to keep the juice. Add the segments to the bowl with the juice.

for the caramel:
  • 200 grams granulated sugar
  • 400 grams orange juice
Place the sugar in a pan on medium heat and begin heating it. Once the sugar starts to bubble and foam, slowly add the orange juice. As soon as the mixture starts boiling, remove from the heat and pour half of the mixture over the orange segments. Reserve the other half of the caramel mixture in a small bowl - you will use this later to spoon over the finished dessert. When the dessert is assembled and setting in the freezer, heat the kept caramel sauce in a small saucepan over low heat until it thickens and just coats the back of a spoon (about 10 minutes). You can then spoon it over the orange tians.

for the whipped cream:
  • 200 grams heavy whipping cream
  • 3 tablespoons of hot water
  • 1 tsp Gelatine
  • 1 tablespoon of confectioner's sugar
  • orange marmalade (see recipe above) 1 tablespoon
In a small bowl, add the gelatine and hot water, stirring well until the gelatine dissolves. Let the gelatine cool to room temperature while you make the whipped cream. Combine the cream in a chilled mixing bowl. Whip the cream using a hand mixer on low speed until the cream starts to thicken for about one minute. Add the confectioner sugar. Increase the speed to medium-high. Whip the cream until the beaters leave visible (but not lasting) trails in the cream, then add the cooled gelatine slowly while beating continuously. Continue whipping until the cream is light and fluffy and forms soft peaks. Transfer the whipped cream to a bowl and fold in the orange marmalade.


Assembling:

Make sure you have some room in your freezer. Ideally, you should be able to fit a small baking sheet or tray of desserts to set in the freezer. Line a small tray or baking sheet with parchment paper or a silicone sheet. Lay out 6 cookie cutters onto the parchment paper/silicone. Drain the orange segments on a kitchen towel. Have the marmalade, whipped cream and baked circles of dough ready to use. Arrange the orange segments at the bottom of each cookie cutter. Make sure the segments all touch either and that there are no gaps. Make sure they fit snuggly and look pretty as they will end up being the top of the dessert. Arrange them as you would sliced apples when making an apple tart.Once you have neatly arranged one layer of orange segments at the bottom of each cookie cutter, add a couple spoonfuls of whipped cream and gently spread it so that it fills the cookie cutter in an even layer. Leave about 1/4 inch at the top so there is room for dough circle. Using a butter knife or small spoon, spread a small even layer of orange marmalade on each circle of dough.Carefully place a circle of dough over each ring (the side of dough covered in marmalade should be the side touching the whipping cream). Gently press on the circle of dough to make sure the dessert is compact. Place the desserts to set in the freezer to set for 10 minutes.
Using a small knife, gently go around the edges of the cookie cutter to make sure the dessert will be easy to unmold. Gently place your serving plate on top of a dessert (on top of the circle of dough) and turn the plate over. Gently remove the cookie cutter, add a spoonful of caramel sauce and serve immediately.

Buttermilch-Panna Cotta Teil I - Desserts mit Löffelbisquit und Himbeeren

Einen meiner Lieblingsblogs den ich regelmäßig lese ist Cannelle et Vanille. Neulich hatte Aran, die diesen Blog schreibt einen 'Gastauftritt' bei Design sponge ("a daily website dedicated to home and product design"). Dort schaue ich auch öfters vorbei, unter der Rubrik 'in the kitchen with ...' hatte ich schon manches leckere Rezept entdeckt, zB auch das für die Walnuß-Ahornsirup-Muffins. Diesmal war ich über den Lemon Curd and Buttermilk Panna Cotta Cake sogar noch mehr begeistert. Ich liebe Panna cotta, aber bis jetzt sind alle meine Versuche eins geschmacklich wie aus dem Laden/Restaurant zu reproduzieren gescheitert. Die Herstellung hörte sich aber simpel an und durch die Butermilch schien es auch nicht zu süß und schwer zu sein.

Meine wilde Leidenschaft für süße Nachspeisen nach einem herzhaften Mahl ist (zumindest Robert) hinlänglich bekannt, und falls ich nicht dazu komme, sorgt er auch für Nachschub in Form von diversen Arten Joghurt, Vanillecreme oder Quark. Falls ich nämlich einmal nichts davon im Kühlschrank vorfinde, kann das schon zu schlechter Laune führen, und wer will schon einen nach Süßem gierenden fauchenden Drachen in seiner Küche haben ;). Man kann es schon als Ritual bezeichnen dass ich auch zur Arbeit immer einen Joghurt oder ähnliches mitnehmen muss.

Das Panna cotta schien zur Befriedigung meiner Gelüste bestens geeignet und wurde sogleich ausprobiert, was dazu führte dass ich sofort davon abhängig wurde. Ich habe seitdem nur noch das gegessen, in verschiedensten Variationen - mit Beeren oder mit Zitronenbeigabe. Nun wollte ich diese Köstlichkeit auch mit auf Arbeit nehmen, also wurde sie in ein Glas mit Deckel gefüllt (bloß gut dass ich immer so viele Sachen aufhebe). Als Krönung gab es dazu noch frische Himbeeren und Löffelbisquit:

Buttermilch-Panna cotta-Desserts mit Löffelbisquit und Himbeeren
reicht für ca 5 kleine Gläser

  • 5 Stck Löffelbisquit
  • 2 EL Limoncello (ersatzweise Zitronensaft)
  • 250 g Himbeeren
  • 250 ml Sahne
  • 55 g Zucker
  • 2 Blätter Gelatine
  • 125 ml Buttermich
Den Löffelbisquit in Stücke brechen und mit je einer Stange den Boden eines Glases bedecken. Mit Limoncello beträufeln. Dann die Himbeeren gleichmäßig in die Gläser verteilen.
Die Gelatine in kaltem Wasser einweichen. Die Sahne zusammen mit dem Zucker erwärmen (das Ganze sollte nicht kochen), darin dann die ausgedrückte Gelatine auflösen, dabei immer gut rühren. Zum Schluß die Buttermilch unterrühren. In die Gläser füllen und abkühlen lassen, danach im Kühlschrank für 3-4 h fest werden lassen.

Banoffee Pie

  • 1 Springform (20 cm Durchmesser)
  • 1 Dose Dulce de Leche
  • 150 g Kekse (Löffelbiskuits, Butterkekse o.a.)
  • 75 g gesalzene Butter, zerlassen
  • 3 Bananen , 1 EL Kakaopulver
  • 300 ml Rahm, 2 EL Mascarpone


Die Kekse in einer Schüssel zerbröseln, die flüssige Butter dazugeben und gut mischen. Die Masse in die Form drücken und im Kühl­schrank fest werden lassen. Bananen in Schei­ben schneiden und auf dem Boden vertei­len. Die Dulce de Leche auf die Bananen streichen. Rahm mit Mascarpone steif schlagen; auf die Creme geben. Den Pie 2-3 Stunden durchziehen lassen, mit Kakaopulver bestreuen, aus der Form nehmen und servieren.

Damit die Sahne schön steif bleibt habe ich einen gehäuften Eßlöffel Sofortgelatine beim Schlgen mit dazugegeben. Anstatt einer runden Form habe ich eine eckige genommen und die Seiten wie bei einer Charlotte mit halbierten Biskuitteilen ausgekleidet. Mein Problem war die Klebrigkeit der Dulce de Leche - die war so gut karamellisiert dass sie sich gar nicht mehr auf die Bananen streichen ließ sondern die Bananen mitsamt Teig nach oben zog und so unschöne Löcher hinerließ - selbst mit erwärmen und flüssig machen ließ sich das Problem nicht wie gewünscht beheben - aber der Geschmack war trotzdem unschlagbar ...

Dulce de Leche

Auf der Suche nach anderen "Goodies" für meine Weihnachtspakete fiel mir wieder mein heißgeliebtes Karamellbuch ein. Laut diesem war es auch möglich Dulche du Leche, argentinische Karamellcreme, selbst herzustellen. Allerdings warnte das Buch auch vor explosiven Überraschungen, da man Dosen mit gezuckerter Kondensmilch in geschlossenem Zustand kochen sollte. Ich versuchte also alle notwendigen Vorkehrungen zu treffen, um dies zu vermeiden. Laut Anleitung sollte das Wasser im Topf nämlich nicht sieden..


Also holte ich meine Induktionskochplatte heraus, stellte sie auf (den abgedeckten Herd) und erhoffte mir von der Temperatureinstellung der Platte einiges. Nur funktionierte es nicht so wie gedacht - bei 100°C blubberte es mächtig gewaltig und die Dosen schlugen gegeneinander dass einem Angst werden konnte und bei 80°C passierte rein gar nichts ... Außer dass sich die Dosen wölbten und ich deswegen schon aus diesem Grund die Temperatur nicht hochstellen wollte. Nach 2 Stunden hin und her entschloß ich mich zu handeln und eine Dose zu öffnen um nachzuprüfen, ob diese Methoden denn überhaupt funktionierte.


Die angestochene Dose spritzte natürlich erstmal heiße Kondensmilch in hohem Bogen durch die Küche (was soll auch sonst passieren?! Auch in meiner Küche herrschen die Gesetze der Physik ...). Das zeigte mir nur dass die Milch zwar heiß geworden war, aber nicht im geringsten schon angefangen hatte zu karamellisieren wie geplant. Also mußte ich doch die Temperatur höher stellen - nach einem kurzen Blick ins Internet fand ich auch ein Mittel gegen das Geklapper - einen Spüllappen auf den Topfboden und dann war glücklicherweise Ruhe. Nur war die Zeit inzwischen sehr weit fortgeschritten und ich wollte eigentlich ins Bett - aber der Topf verlangte nach regelmäßigem Wassernachfüllen ...


Ich stellte mir den Kurzzeitwecker und die Zeitschaltuhr der Platte ein. Irgendwann in der Nacht war dann alles fertig (der Lappen im Topf festgebacken und alles eine große Schweinerei da die offene Dose rumgekleckert hatte). Zur Überprüfung des Ergebnisses machte ich dann die ohnehin schon offene Dose auf und fand erstmal eine Sahne-Wasser-Lache vor. Nachdem diese abgegossen war kam eine klebrige schokobraune Masse zum Vorschein und ich jubelte insgeheim über die gelungene "Verwandlung". Aus meinem guten Papier aus dem Bastelladen stellte ich noch neue Banderolen her - jetzt kann das Ganze für teuer Geld verkaufen ;) Und was macht man damit? Banoffee Pie zum Beispiel.


Rharbarber-Quarkmousse

Nachdem ich auf Rharbarberjagd einen Bund erstanden hatte und ein leckeres Kompott mit Vanilleschote drin gekocht hatte stellte sich die Frage was ich mit dem Rest machen sollte, schließlich konnte ich das ganze Kompott nicht alleine essen. Eine Möglichkeit wäre ein Crumble oder Jamies Souffle gewesen, aber meine Eltern mögen beides nicht wirklich. Also mußte ich zur Resteverarbeitung greifen - Quark und Sahne hatten wir noch im Haus, außerdem Gelatine. Also Kompott und Quark mit etwas Vanillezucker zusammengerührt, in warme Gelatine eingerührt und zum Schluß geschlagene Sahne untergehoben - etwas "krümelig" auf der Zunge, aber nicht schlecht ...